Rodrigo Friscione guides us through the essentials to capturing great shots of pelagics:
If you’re an underwater animal lover, pelagics are the ultimate goal: Nothing compares to facing a wall of silky sharks, being checked out by a mola mola or swimming side by side with grey whales. Chasing after pelagic wildlife is extremely exciting and also very demanding physically. Subjects are usually big animals, which makes them fast and elusive. The pursuit is as thrilling as getting the shot.
Pelagic photography is key to conservation because it offers a vision of a fragile ecosystem not exposed to the wider public very often. Every single image you bring back helps to create awareness, and therefore encourages others to appreciate and protect the wonders of the open ocean.
Stay close to bait-balls even if you don’t see any predators – you never know what’s around the corner. Equipment: Nikon D300, Nikkor 10.5mm lens, Nauticam housing Settings: f/8, 1/160s, ISO 200
Carefully pick your subject, and your moment
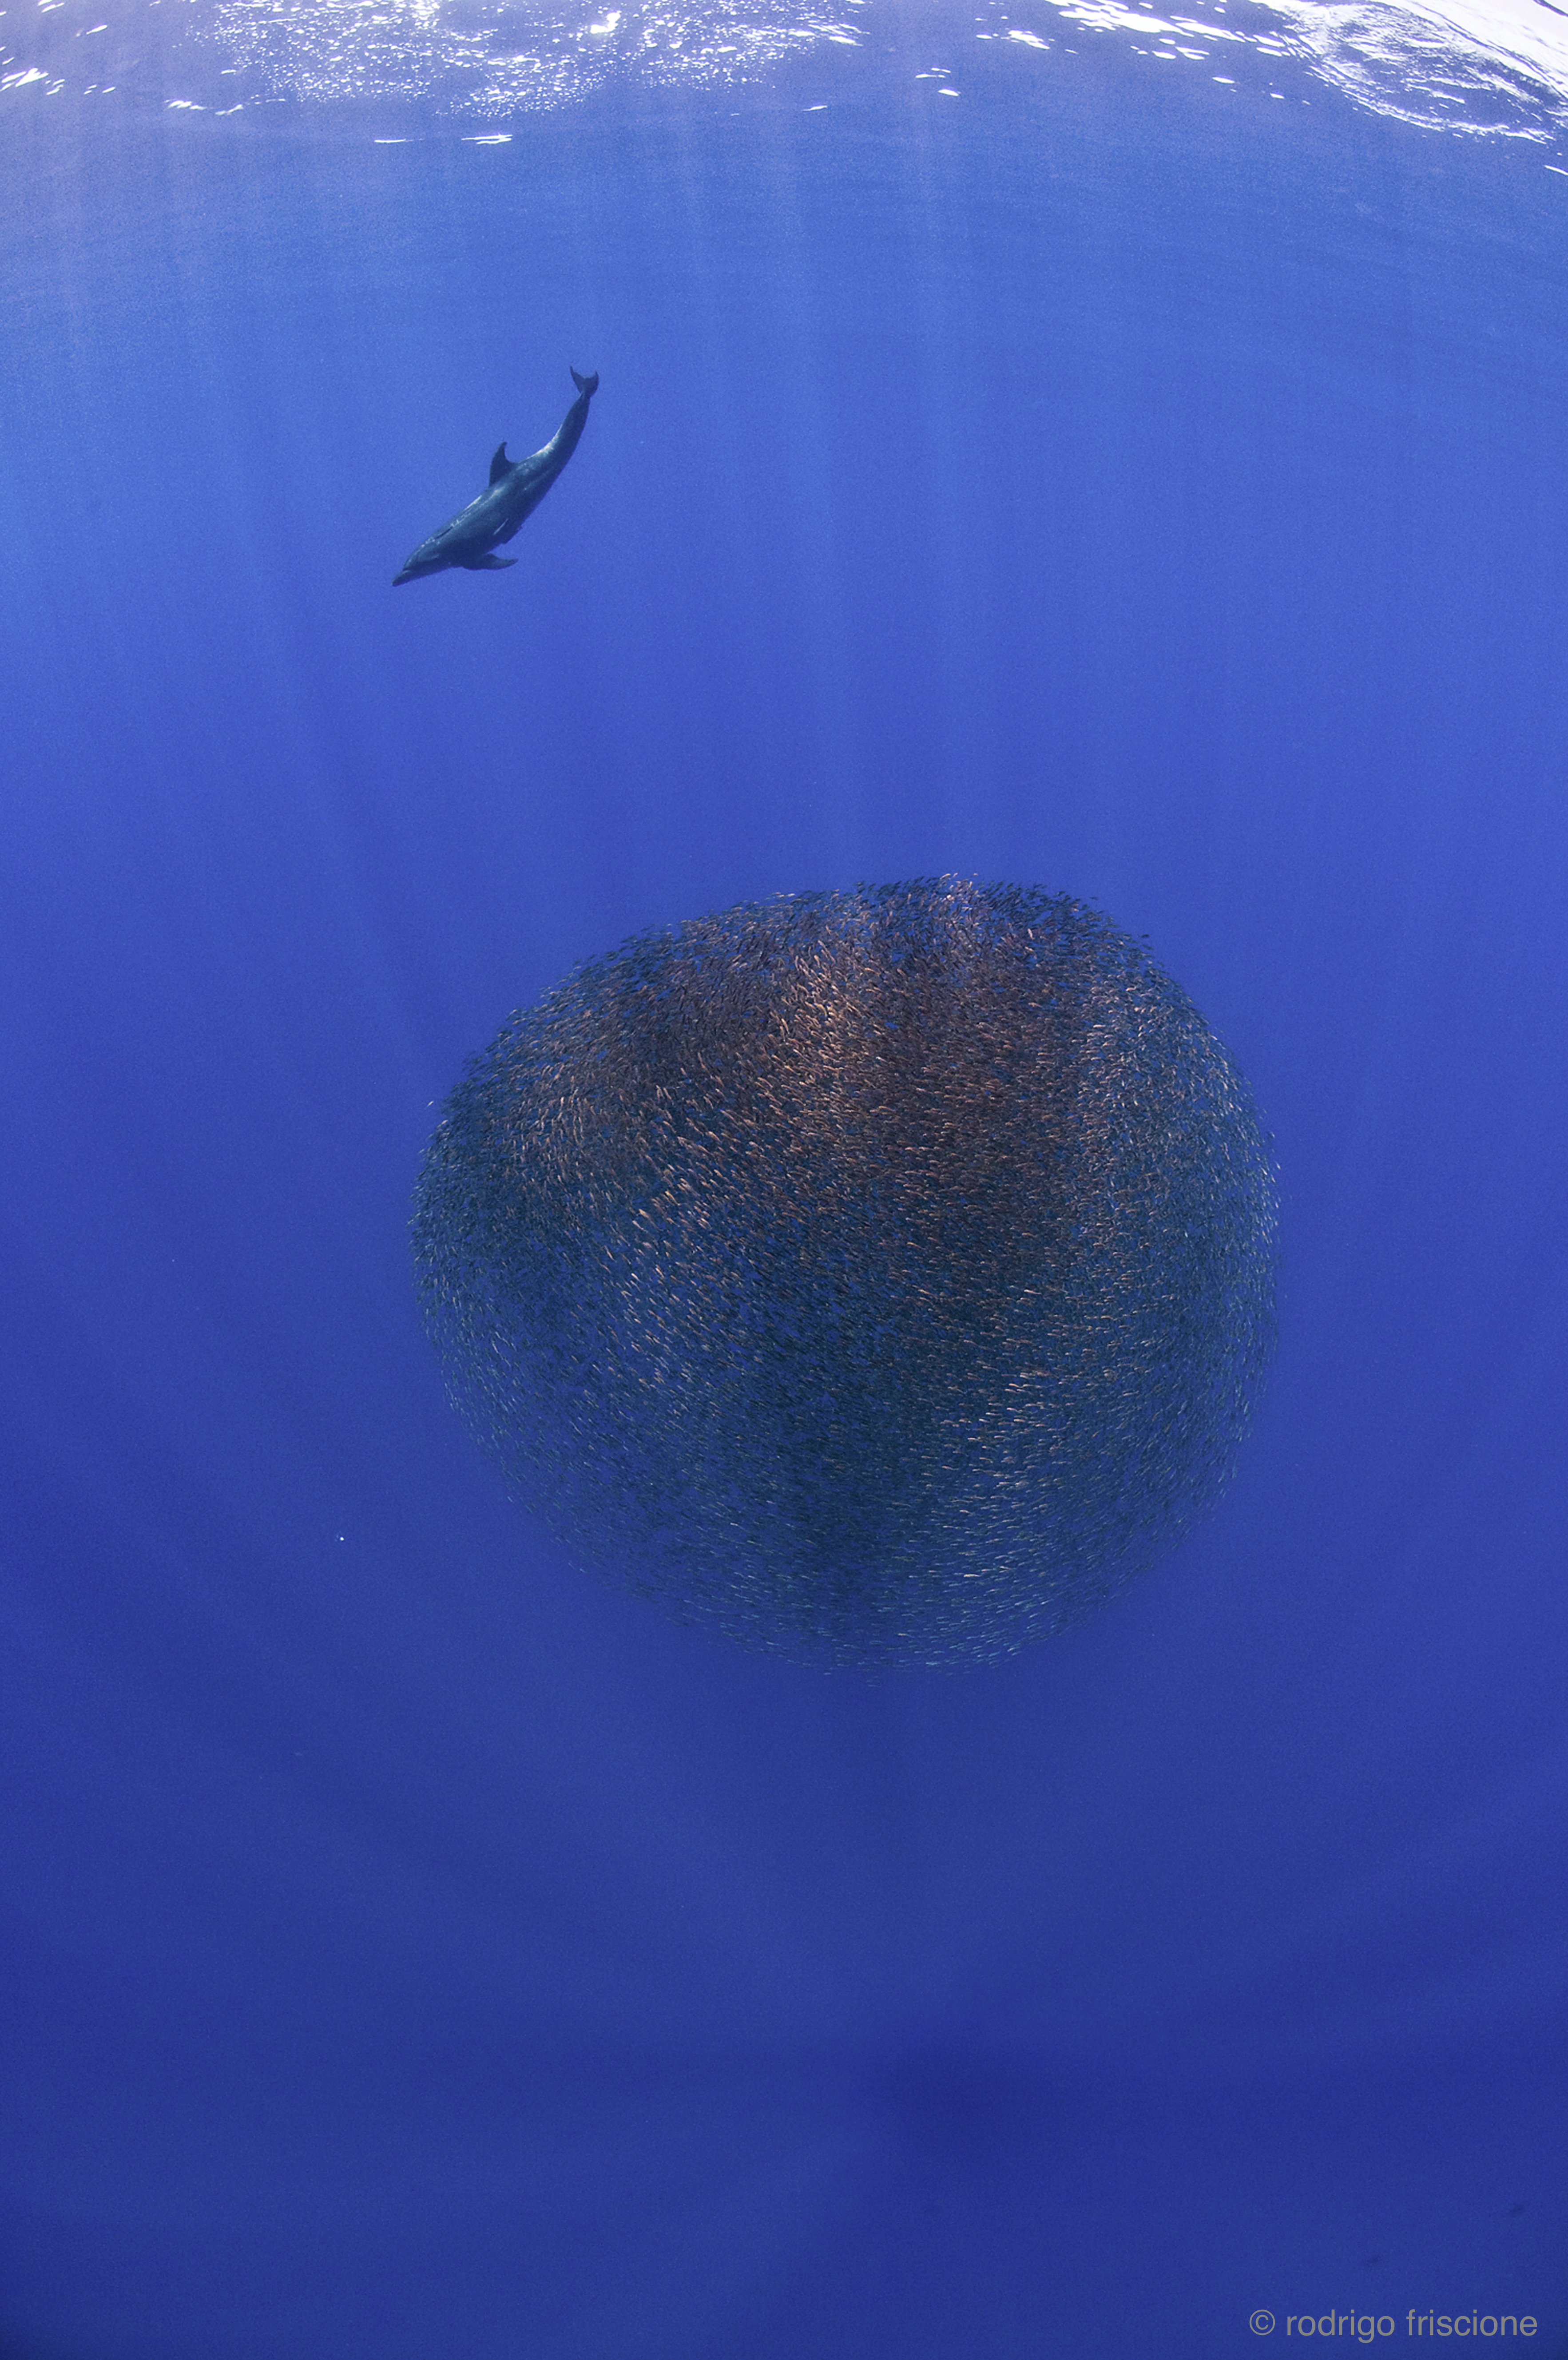
Most popular subjects are always migrating and/or feeding. The best approach is to stay close to the food source, whether that’s chum, a giant bait ball or infinitesimal krill. Baitballs are a guarantee for pelagic shoots and my personal favourites. Sailfish and striped marlin, for example, chase sardine baitballs, herding them from the bottom to the surface, and then taking turns to hit the ball with their bills. They are neither curious about nor scared of divers, but always focused on the baitball. They move extremely fast – and to keep up, so should you! Keep an eye out for tuna, sharks and birds hitting the baitball – they will always spice up your frames.
Sharks are often curious about divers. You can get some good passes if you wait patiently in one spot. Whale sharks, in the Mexican Caribbean, are the ideal first encounter. These gentle giants gather by the dozen – sometimes hundreds – to slowly feed on the surface. Water is usually Caribbean-blue and whale sharks are forgiving when it comes to missing the shot; you will most probably get another ten chances at the exact same framing. You have plenty of room to play with different settings, split shots and counter light shots.
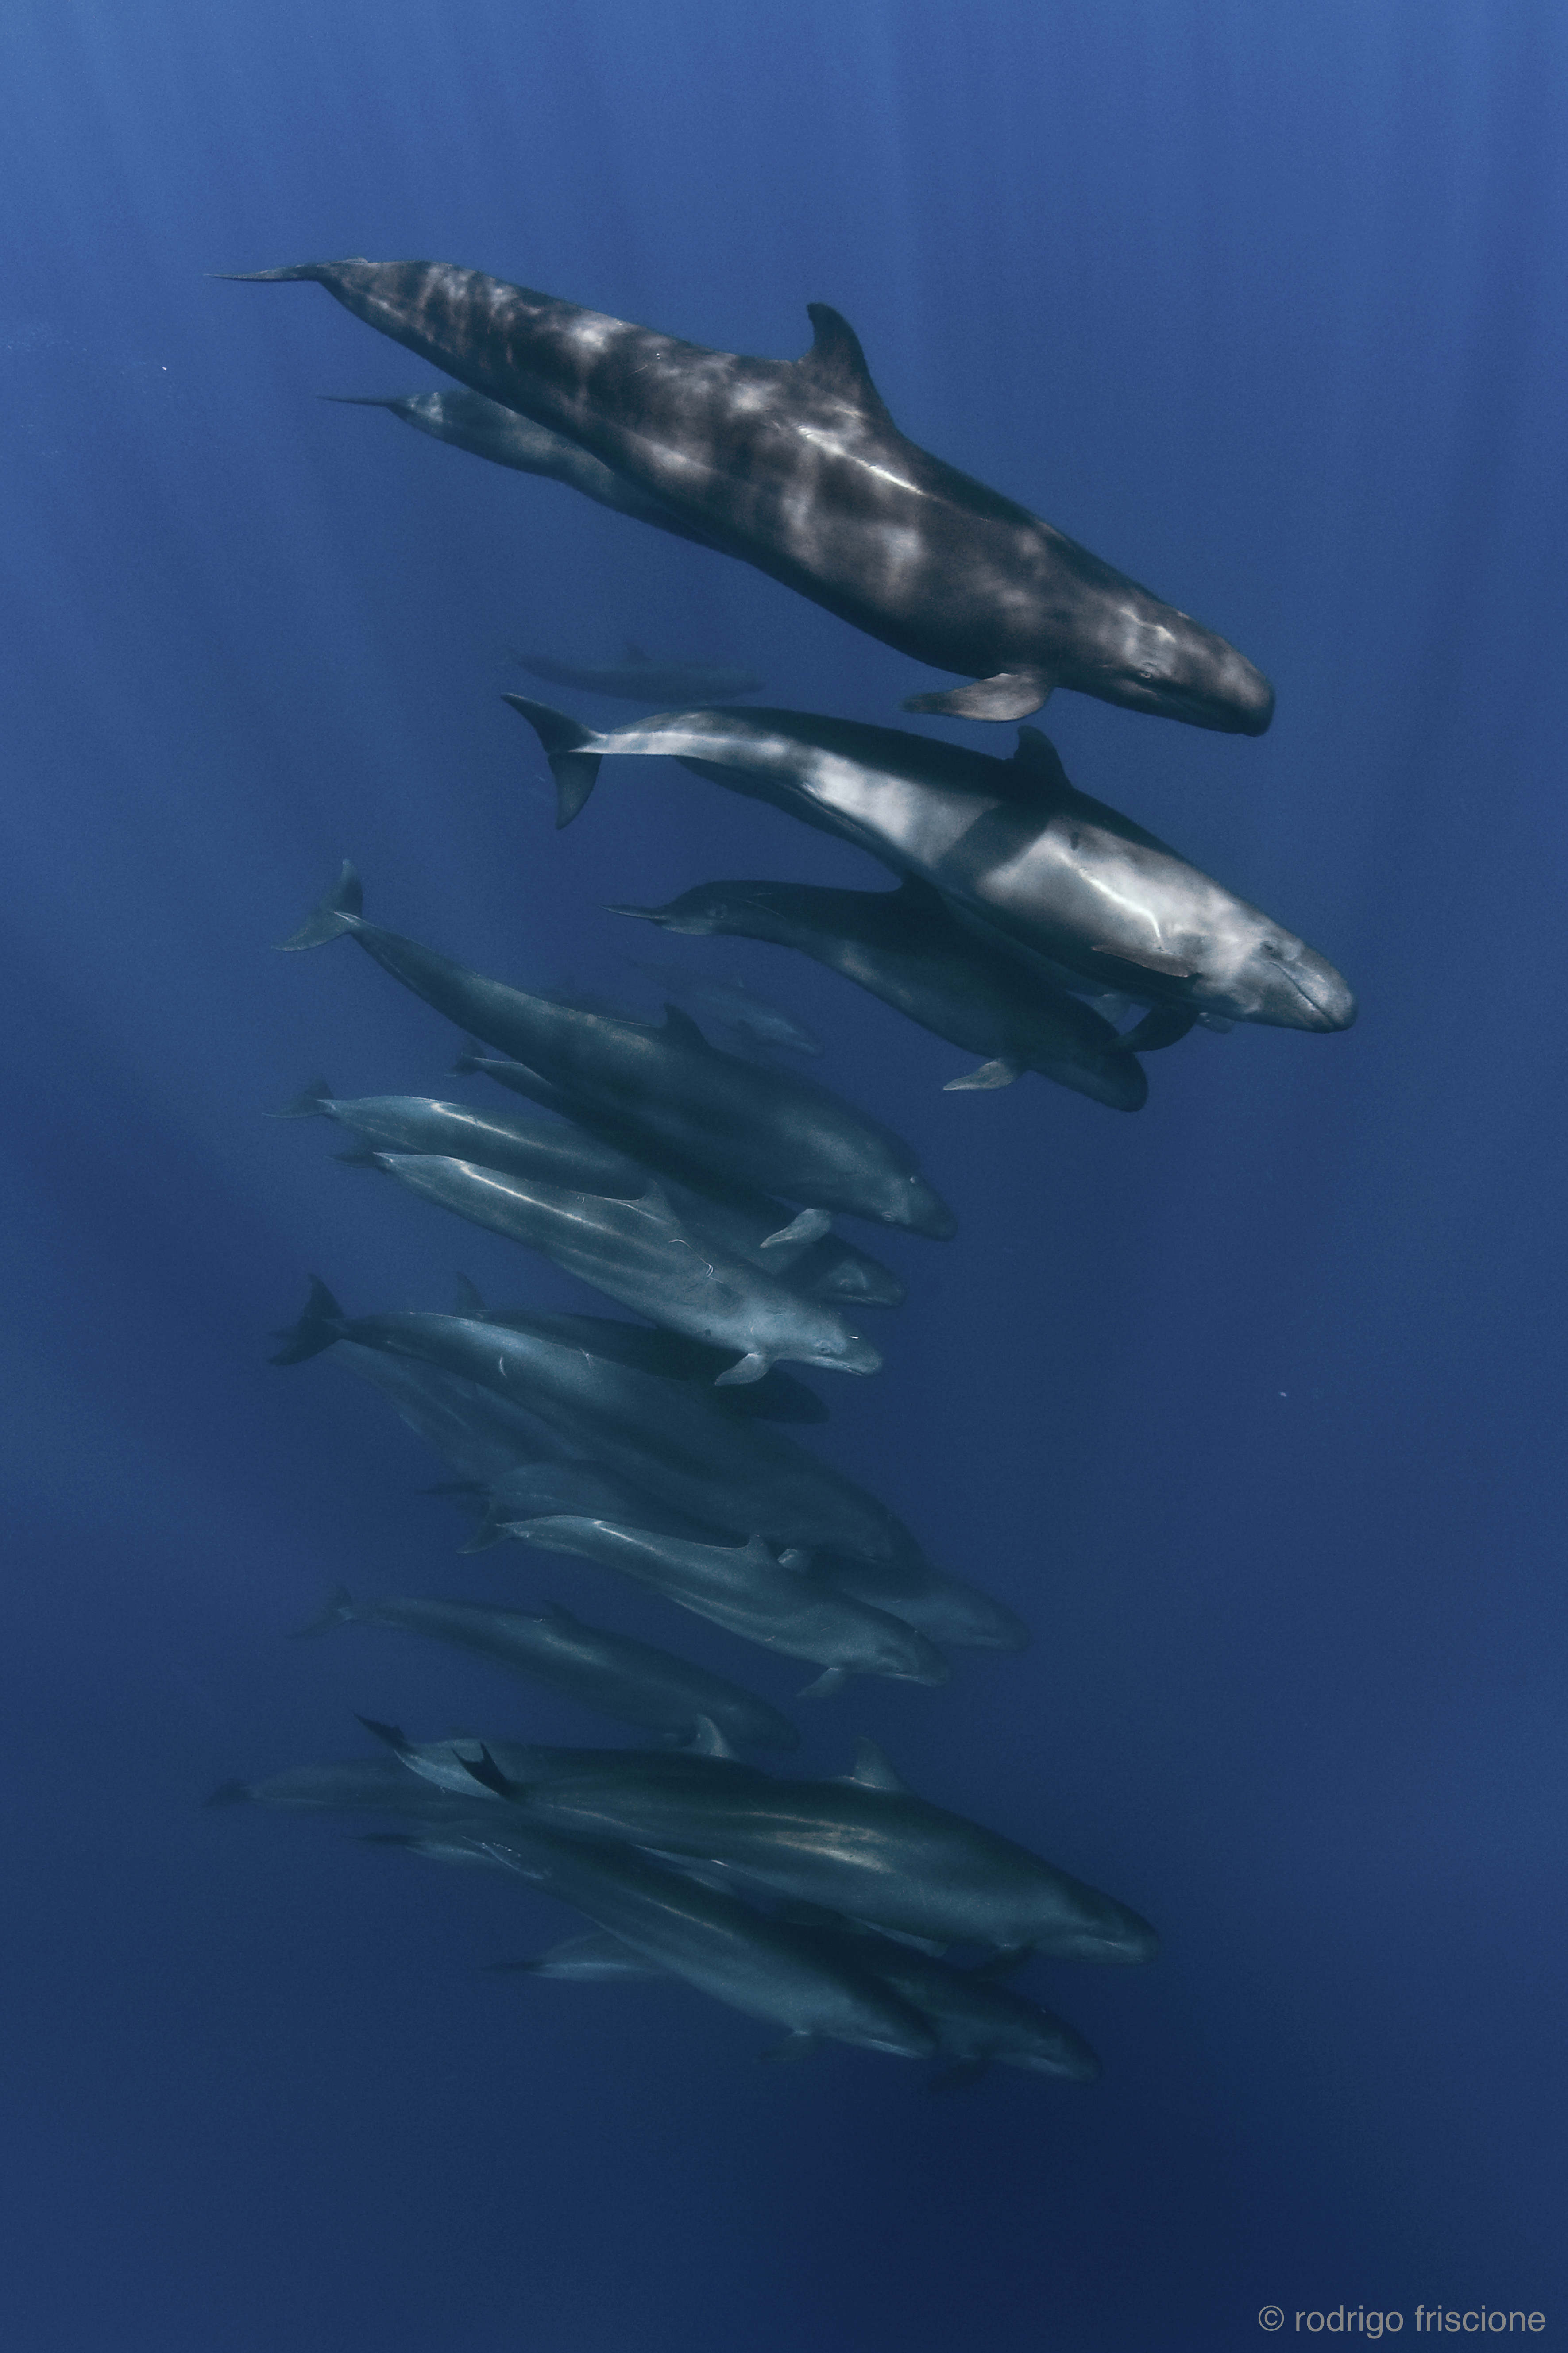
Whales are shy and skittish, especially if they have calves around. Try jumping way ahead of their path and diving down immediately. Don’t move: let them come to you. I’ve found this to be the hardest subject to capture. Other than in waters of the Dominican Republic or Tonga, whales avoid both boats and floating divers. Still, with patience it can be done.
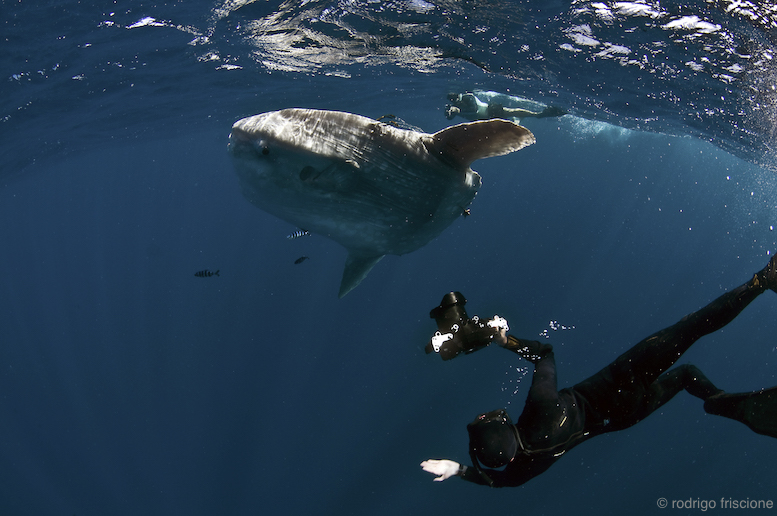
Many other surprises can pop up out of the blue, literally. Great examples are mola molas. Sometimes they take off immediately and other times they will play for hours. Remember to always approach any animal slowly and calmly. Don’t get in their way and try not to touch them or bump into them. You don’t want to hurt them or scare them off.
Make sure to have the essential gear
DSLRs are vital for proper pelagic photography because the action usually happens so fast – too fast for the shutter lag common in compacts. If you use a compact, try to predict the animal’s movement or behaviour, and shoot before it happens. With practice, you’ll be surprised how many times you can nail a good shot. Consider also wider framing, in case the subject makes a sudden turn.
Another great advantage of DSLR cameras is burst shooting. All models now offer some kind of burst mode, which is a real boon when you only have one good pass. Strobes are not the rule; rather, they’re the exception. Most probably, you’ll have a pelagic encounter whilst snorkelling, so the power of the sun is on your side. Strobes and arms also generate noticeable drag, which will slow you down.
Since pelagic fauna is usually big or schooling, lenses from wide to fisheye are standard. The choice of fixed or short zoom comes hand in hand with the subject you’re after: If you expect easy, close encounters (whale sharks) then fixed super-wide or fisheye are best. If, on the other hand, you are chasing fast, erratic animals (sailfish or marlin), you might have better results with a mid-range zoom.
My regular lenses are the Nikon 10.5mm fisheye, Sigma 15mm fisheye and Nikon 10–24mm ultra-wide zoom. Other popular lenses include the Tokina 10–17 (DX), Nikon 14–24mm (FX), Canon 14mm (FX) and Canon 16–35mm (FX). These wideangle lenses are powerful tools as they have a large depth of field, useful for an on-the-move subject.
Be mindful of your subject and other divers – respect the animal’s space so as not to scare them off. Equipment: Nikon D300, Nikkor 10.5mm lens, Nauticam housing Settings: f/10, 1/200s, ISO200
Become familiar with key techniques
The overwhelming approach for this kind of photography is the most basic: Get as close as possible and shoot as many frames as possible – because you never know if you’ll get another chance. Remember to make the most of burst shooting.
You’ll often be shooting with your arms extended in front of you to gain that extra foot towards your subject. Be careful about your dome’s position: housings tend to float dome-first and the result might be your photos pointing way up. Keep in mind that the best images always show the eyes of the animal in perfect focus.
Freediving is a great way to approach pelagics and take advantage of their curiosity. Equipment: Nikon D300, Nikor 10.5mm lens, Nauticam housing Settings: f/7.1, 1/160s, ISO200
Avoid “automatic” and “aperture priority” modes. If you are not shooting completely manual, then go for “shutter priority”. Consider fast shutter speeds (1/200s or shorter), so you won’t get blurry results. Compensate with higher ISO if your maximum aperture isn’t sufficient for the shot. I always work with an exposure compensation of –1 stop or –2/3 of a stop to avoid overexposing and also to get deeper blues whenever I’m shooting vertically. Shoot RAW to give you the ability to fix white balance during post-processing.
If you insist on using strobes, hold them with very short arms to reduce drag. Point them outward or upwards, never towards your subject. Big animals are very sensitive to light and you might hurt or scare them away. Additionally, some subjects – especially billfish – have highly reflective scales that might burn your image with a direct strobe discharge.
More than technique, of course, you’ll increase your chances of getting great shots if you are in the right place at the right time. Nothing ensures a successful encounter like spending plenty of time out in the ocean.
This article featured in SD OCEAN PLANET Through The Lens (Issue 6/2013)
You may also like