Home Blog Page 102

A day in the life of an Underwater Archaeology Photographer

0

I hover above the ancient marble column about 45 metres below the surface of the Mediterranean Sea. Holding my underwater camera housing in one hand, I use the other to direct my dive model through the azure water. The photograph I have visualised in my mind’s eye, and meticulously planned, comes together. I lift the camera and click the shutter. Two thousand years ago a Roman ship sank, lost and forgotten off the coast of Turkey. Today, I am here to photograph its excavation.

My role on the excavation is to create “sexy” underwater images both for publication, and to help raise funds for the excavation. Once a significant artefact is found, I work out a plan to shoot it. I’ll conceive an image, then choose from the photographic tools in my arsenal to capture it. (Sometimes I make what I need on the fly, such as the snoot I crafted in Sri Lanka from a soda bottle, duct tape and black marker.) If models are involved, I’ll sketch the shot and we’ll thoroughly discuss the photograph on the surface. Time and communication underwater are limited; the more that is hashed out ahead of time, the smoother the shoot will go. We dive in shifts, so to reduce the likelihood of backscatter, I usually go first. Descending onto an ancient artefact, knowing that the last person who touched it lived thousands of years ago, sends a chill down my spine!

To date, I’ve worked as the photographer on five underwater excavations around the world: Sri Lanka for the ship from the 2nd century BC carrying a load of heavy iron that likely caused its demise; Egypt for the 18th-century Ottoman wreck, its impressive wooden hull not yet devoured by shipworms; Spain for the 7th-century BC Phoenician shipwreck, its trade goods spilled along a gentle underwater slope; Turkey for both a Roman wreck carrying an entire column in sections, and a Bronze Age wreck.

They’re glamorous shipwrecks, but it’s demanding work with long days and sacrifices. I’ve lived for weeks at a time on a cramped sailboat with 15 other archaeologists and one working toilet. I’ve Skyped with my dentist in the States while seeking emergency dental care in Turkey. I’ve survived on a diet of chickpeas and Snickers bars. I’ve lived without creature comforts in pursuit of the ultimate shot. In short, I am living my dream and it is amazing!

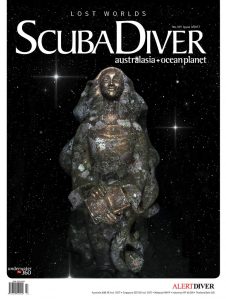
This article is an excerpt from Scuba Diver‘s “Lost Worlds”. To read more, purchase a copy of this latest issue or subscribe here at our online shop.

9 Things you might not know about Decompression Illness

0

Remember that the term decompression illness (DCI) includes both decompression sickness (DCS), resulting from dissolved nitrogen (or another inert gas) being eliminated from a diver’s body tissues, and arterial gas embolism (AGE), which is caused by air entering the arterial blood as a result of a burst lung.

Divers who get DCI have often been diving within the limits of their dive computer or tables. The risk of DCI increases upon exceeding these limits, which indicates that the limits cannot accurately account for individual differences between divers and the various factors that can influence nitrogen uptake and elimination during a dive. All divers shouldadd conservatism to their decompression calculations, especially if the diving is purely recreational and dive time doesn’t need to be maximised.

Many dive operators in remote areas do not have access to a sufficient supply of oxygen. It can sometimes take over 24 hours for an evacuation team to reach some remotelocations, so a large supply of oxygen is required to last until an injured diver receives appropriate medical care. Check this out before going on a trip to an area without good access to suitable medical facilities.

This is often associated with the presence of a patent foramen ovale (PFO). Skin-related DCI used to be relatively uncommon in recreational divers, but in more recent years, it has become far more common. Part of the reason for this could be the result of the more frequent and longer dives and shorter surface intervals enabled by dive computers.

It used to be thought that one had to dive deeper than 10 metres before DCS was a risk, but this is now known to be untrue – some divers have suffered from DCS after ascending from six or seven metres.

Caused by repetitive and deep dives, these bubbles can be detected using ultrasound, and usually do not cause symptoms. Some divers “bubble” more than others. A slow ascent rate and doing a safety stop reduces the amount of bubbling and therefore the risk of DCI.

Divers with a patent foramen ovale (PFO), which is a common heart defect that can enable blood to flow across the heart, have a significantly higher risk of DCI (sometimes quoted as two to eight times, depending on the size of the hole). Other factors such as being overweight, age, lack of fitness, and dehydration may also play a role, although there is little hard evidence to support some of these beliefs.

Oxygen first aid is very important in the management of DCI, but it is often delayed and given using unsuitable equipment for a short period. To maximise the benefit, near- 100 percent oxygen should be given from the time symptoms first occur, and should be continued until a diving doctor advises that it be stopped.

Boyle (see Boyle’s Law) placed a viper in a vacuum and noticed a bubble forming in its eye.

If a diver fills their lungs with compressed air and surfaces without exhaling, there is enough pressure change in the first 1.2 metres from the surface to over-expand the lungs to the point of causing a tear.

Taken from Asian Diver’s DIVERAHOLIC, volume 145

10 Ways You can become a Mermaid

0

Looking to get into that graceful photogenic dance below the waves, but have no idea where to start? It’s an experience and skill like no other: Appearing natural when posing is difficult for most topside fashion models, let alone pulling it off when underwater, dressed as a mermaid. Joyce Ng – one of Southeast Asia’s most exciting mermaids – takes UW360 through the process of becoming one, and the experience of being on a sub-aqua shoot.

Before a dive, remember to stretch your legs and warm up before you swim in your mermaid tail. The mermaid tail is rigid, which means that your legs can easily cramp.

When looking for a tail, it’s good to start with a fabric mermaid tail (with a monofin/flipper inside) before you move onto silicone. Silicone mermaid tails appear more “realistic” but are heavier than fabric, and are much more difficult to control.

Always practice in a pool first. Make sure you can swim comfortably with the mermaid tail before you swim in the sea.

Try to learn the “dolphin kick” when swimming with a monofin. Kicking the tail with your legs alone will not “look good”, as this movement is not an effective mermaid swimming technique.

Make sure you look around before entering the water to see if there is anything harmful in the immediate vicinity, such as sea urchins or fire coral.

Beginners should always choose mermaid tails with softer monofins as it takes time to build up leg muscle to use stiff monofins effectively.

Have a buddy accompany you when you swim with your mermaid tail. As your legs are tightly set in the tail, you may not be able to get your legs out immediately if there are any emergencies.

Mermaids typically do not wear masks, but it is good to practice swimming with a mask at first. This is to get comfortable with the thought of being underwater.

If you swim in the sea, please be both aware and careful of damaging the coral. A mermaid tail substantially adds to your body length. When you kick with your fluke or are touching the bottom, you may disrupt fragile coral.

Always consider your safety first, and don’t push yourself past your limit.

Taken from Asian Diver’s DIVERAHOLIC, volume 145

Pangatalan Island: A Sustainable Development

0

Since 2012, Sulubaaï foundation has been implementing a sustainable development model on and around Pangatalan Island – a tropical paradise northeast of Palawan, Philippines. By receiving guests on the island, the project has remained self-sustainable, at the same time providing employment for the locals in the area. The 4.2-hectare island is a restored beauty thanks to the efforts of Sulubaai Foundation to replant the native flowers, trees, and plants that were destroyed by deforestation. The island is surrounded by a 41-hectare Marine Protected Area where guests can snorkel and dive. The area includes a fringing reef and one isolated patch reef. With a total of 12 diverse ecosystems, there is much to explore in the waters of Pangatalan Island. Due to land destruction, illegal fishing, and bleaching events, Sulubaaï has spent much of their efforts on restoring the ecosystems around the island. The team planted 5,000 propagules in the mangrove nursery to facilitate regrowth, after losing 1 hectare of the mangroves from the use of mangrove wood to make charcoal.

In order to accelerate the resilience of the reefs, Sulubaai has been helping to restore the corals by fixing unstable coral fragments on concrete support when needed or, directly on strong reef structures using nails and ty wire.

The island is powered completely by solar energy, and all structures and furniture are made from recycled material. Visitors will be treated to organic food from the two-hectare farm that feeds all the staff and volunteers on the island.

Volunteering

If you would like to become involved, volunteering opportunities are available on the island. Tailored to your personal interests, volunteering on Pangatalan Island will be a valuable experience for anyone interested in sustainable tourism and conservation.

  • A maximum of 2 volunteers at a time.
  • Volunteering is available all year long, except when guests are on the island.
  • A personal project is crafted for every volunteer to give them the most fulfilling and valuable experience. It will be discussed before booking.
  • If volunteers would like to dive, they must at least be a qualified rescue diver, and ideally be a certified dive master.
  • Volunteer period is usually one to two weeks long, but volunteers are welcome to stay longer depending on the project.
  • Volunteers will stay in the staff house and eat with the staff.
  • Expenditure: Volunteers are required to cover their own travel costs and contribute 1000 PHP (about 20 USD)/day each. This amount includes food, accommodation, and transportation from and to El Nido).

For more details, head over to www.sulubaai-foundation.com or contact them at contact@sulubaai-foundation.com


10 Tips for Photographing Marine Life

0

Photography is a fantastic practice to help promote the need to save marine life – but aggressive photography, one that intrudes upon marine life’s welfare, can be detrimental to the oceans. Dr Richard Smith brings you 10 fantastic tips on photographing marine life It’s not worth destroying a habitat in order to get a shot: If it’s not accessible, then move on. Be aware of your surroundings when you shoot – be careful not to damage other marine life. Rather than manipulating your subject, exercise patience and wait for the animal to move into a beautiful space. Learn its territory or preferred hiding spots to anticipate the shot. Allow your subject to become accustomed to you before shooting. If they’re relaxed, they’re more likely perform natural behaviour, which always makes for the best images. Don’t touch or move your subject in any way. They are fragile and easily stressed. Besides, you’ll get better, natural images if they aren’t defensive. Avoid bright focus lights. Marine animals are typically used to low-light conditions. Often as not, there will be only one opportunity to catch that moment of fleeting animal behaviour you’re after. Have your strobes set, your settings ready, and keep your wits about you. Take time to learn about your subject. Read all you can, observe behaviour, and talk to local guides who know the species well. Don’t take too many shots. Be discerning about how you take your photographs, and spare the animal’s retinas. Back off from an animal that is becoming stressed and changing its behaviour.

Taken from Asian Diver’s DIVERAHOLIC, volume 145

The search for the Bio-fluorescent Hawksbill Sea Turtle

0

Following Dr David Gruber’s discovery of the bio-fluorescent hawksbill sea turtles near the Solomon Islands, film-director Klaus Obermeyer was inspired to witness these special creatures himself. Together with a team of 45, Obermeyer began his mission to capture the bio-fluorescent turtles with Canon’s new ME20-SF low light camera. It was a gamble – these creatures had only been documented once before – but an opportunity that not many will experience in their lifetime. The hawksbill sea turtles are a critically endangered species;  illegal trade, loss of habitat, and susceptibility as bycatch are wiping out this precious species that are so vital to marine ecosystems.

Nevertheless, the team flew into Munda with hope and faith in the wonders of the Solomon Islands. For two nights, Obermeyer descended into the depths of Mbigo Mbigo, a dive site famous for its amazing clarity and unmatched coral formations and turtle population. Blue light and a yellow filter were needed to bring the bio-fluorescent world to life. As if on cue, a turtle found its way to them on both nights. “The experience of seeing the turtle for the first time was incredible! The beauty of the glowing bio-fluorescence, combined with the elegance and otherworldly beauty of the turtle was mesmerizing,” Obermeyer recalls. In his correspondence with National Geographic, Alexander Gaos, director of the Eastern Pacific Hawksbill Initiative, shared that bio-fluorescence in animals is often used for finding and attracting prey, or as a defence mechanism. It could also be a form of communication. Gaos suggests that the hawksbill sea turtle could be fluorescing to camouflage with its habitat. Little is known about the reason for fluorescing due to the lack of documentation, but hopefully, as they start to peak the interest of divers, researchers, and photographers from around the world, we’ll find out more about how to save this precious species. If you would like to help save this species, visit www.hawksbill.org to get involved. Alternatively, visit the Solomon Islands yourself and volunteer at the eco-resort of Tetepare where you can participate in turtle tagging and nest protection while enjoying the untouched beauty of the region.

Mating Season: The Australian Giant Cuttlefish

0

The Australian giant cuttlefish, Sepia apama, is the largest cuttlefish in the world and aggregates in the cold waters off Point Lowly, Whyalla, South Australia. The annual event, commencing in May through to July, brings hundreds of thousands of cuttlefish in search of a mate to the waters off Point Lowly – the only place in the world the cuttlefish aggregate in such large numbers. The main dive spot is very accessible and can be found on a dirt road, named ‘Cuttlefish Drive’. A rope leads visitors 15 metres into the water, where cuttlefish are already gliding by as they walk into the water. You don’t need to go far or dive deep to have great interactions with the cuttlefish as they aggregate close to shore and in only five metres of water. The Australian giant cuttlefish has a relatively short lifespan, usually only living for two to four years. As such, this aggregation is essential for the continuation of the species. After the breeding season ends, many will die. Mating can be aggressive, with males usually dominating the number of females 10 to 1. The larger males must show dominance over both the females and smaller males in order to win the breeding rights. The males are constantly changing their colours and pulsating zebra stripes that move along their bodies. This helps them appear more attractive to females whilst intimidating potential rivals. Surprisingly, the smaller males manage to secure about a third of the mates. They mimic the female’s colouration and behaviour as a disguise, sneaking close to them and hiding under the crevice of rock shelves, while the larger males are busy protecting the females and intimidating other males. Mating takes place head to head, the male fertilises the female with spermatophores – a small package of sperm which is transferred to the females ovipore. After the fertilisation is complete, the female will lay between 100 and 300 small lemon-shaped leathery white eggs in subtidal crevices. Whyalla provides the perfect incubation temperature for the eggs to hatch. Unlike many other cephalopods, both the female and the male cuttlefish do not guard their eggs. Instead, they are left to hatch after three to five months. If you are a keen diver or snorkeller in South Australia for the aggregation season, I’d definitely recommend making your way to Whyalla for this amazing phenomenon. Apart from the thousands of cuttlefish, large pods of bottlenose dolphins and seals are often seen hunting on the aggregating cuttlefish. Cameron McFarlane is an ocean photographer from Shellharbour, South Coast of New South Wales, Australia. Originally into surf photography, he is now focusing on underwater photography after diving the local dive spots and discovering how diverse and rich life is beneath the surface. 

Instagram – @cam_mcfarlane_photo