
Snoots are devices that reduce beam angles from light sources in order to provide photographers with more control over the illumination of their subjects. In their simplest form, snoots can be just cylindrical pieces of tubing attached to the front of a strobe or other light source. Other designs incorporate a fine grid – resembling the grill of a car – at the snoot’s tip to further direct the exiting light beam. Commercial snoots are offered by a limited number of maufacturers, such as Seacam, which are fitted specifically to their strobes. But snoots can also be constructed from common household items such as toilet paper rolls, funnels, and PVC piping.
The diameter of a snoot’s front and back opening and its proximity to the light source are two factors that affect the angle and size of the beam. The smaller and closer the “entrance” aperture and the smaller and farther the “exit” aperture, the narrower the beam will be — and vice versa.
The intensity of a snooted light beam is dependent on the reflectivity of the internal surfaces of a snoot. When constructed from highly reflective materials (i.e. white, silver, mirrored, etc.), it’s possible to create a more concentrated light beam than the unsnooted strobe, so battery life can be prolonged. Conversely, when constructed from highly absorptive materials (i.e. black), you may need to boost the strobe power to maximum in order to obtain enough illumination.
Why use a snoot?
♦ Isolate the main subject
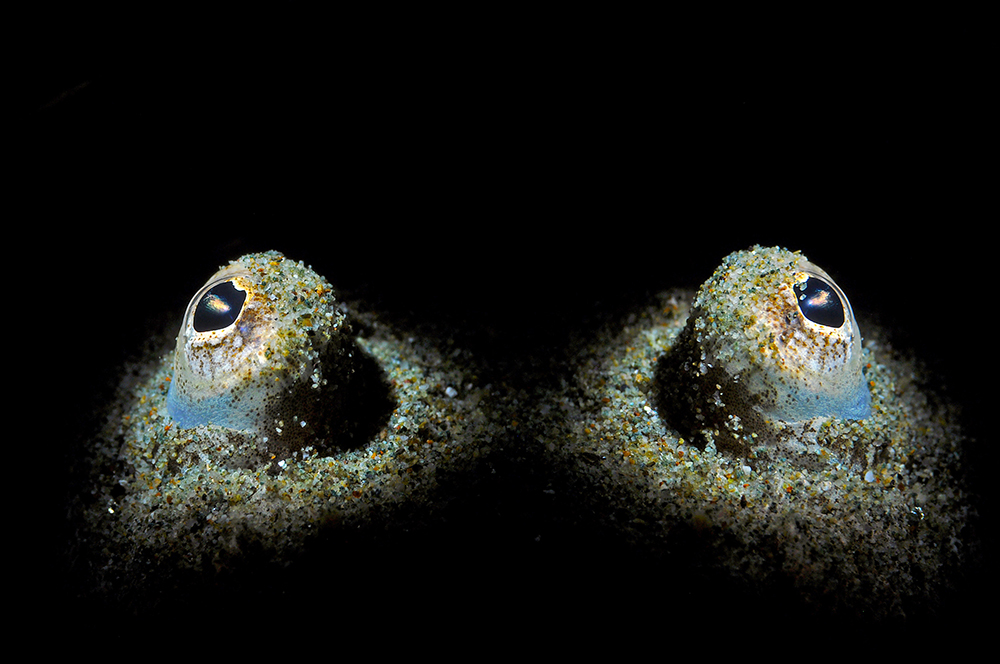
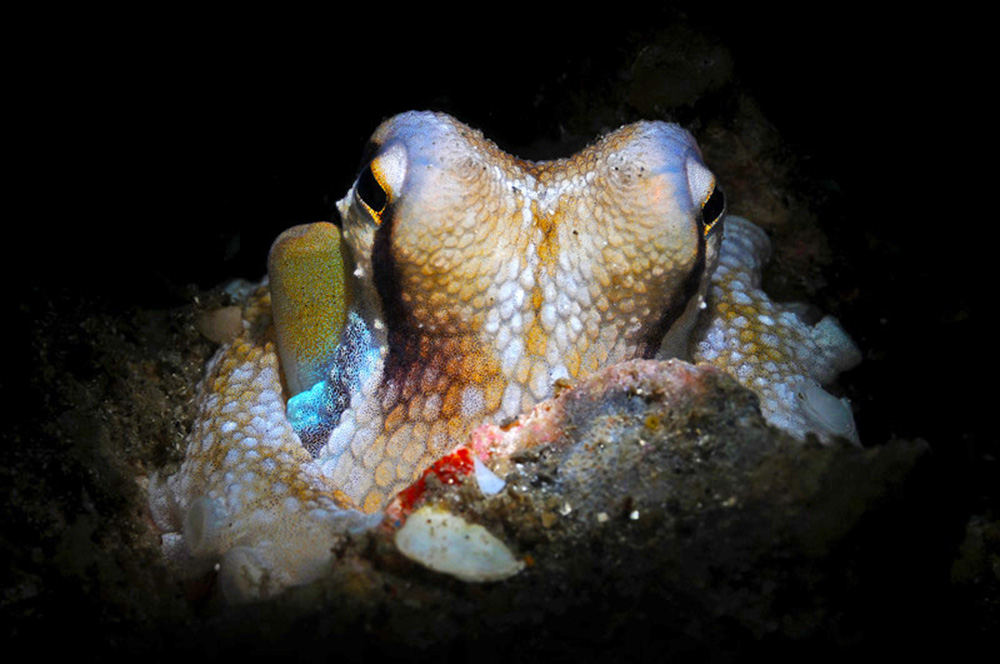
Photographers strive to create images with black backgrounds to make the subject in the foreground “pop,” but it’s difficult to prevent strobe light from hitting the background as well — a snoot can solve this problem. Since a strobe’s beam angle is greatly restricted by a snoot, the light can be projected exactly where you want it, eliminating distracting background and foreground elements and giving a spotlight effect.
♦ Minimize backscatter
Backscatter is seen in images when stray strobe light illuminates suspended particles between the camera’s lens and the subject. By snooting a strobe, you decrease the beam angle, making it easier to control stray light and minimizing backscatter.
♦ Illuminate directionally
Light coming out of a heavily-snooted strobe is strongly narrowed and much more directional – as if it was coming from a distant source. Because the snooted light rays are more parallel with each other, they create harsh, sharp-edged shadows when cast over a textured surface. When using a snoot to create these shadows, remember that narrower beams produce sharper shadows.
This property can be used to emphasize textures of corals, create dramatic shadowed images, or give common subjects unusual moods.
♦ Create unique images
These uses of snoots can be combined to create exciting, thought- provoking, and most importantly, unique images. Even the most common subjects can be given a “wow factor,” which can make your trip’s image gallery instantly more memorable than others.

Design and Application
Snoots can be used in wide-angle, macro, and super macro photography. However, their design and method of application to each of these branches of photography differ greatly.
♦ Wide-Angle
Wide-angle snoots are the simplest to construct. In most cases, sharp-edged beams are not necessary, so very short and wide aperture snoots are often enough to do the trick.
Aiming strobes with laser precision isn’t necessary in wideangle snoot photography since you can usually eyeball proper alignment relatively easily. If your strobe has a strong modeling light, turn it on and use it to simplify the aiming process. Don’t be afraid to take some initial test shots to make sure that the light is being directed where you want it.
If your subject is in deep water, you might want to take a single photo of it with “normal” lighting for reference and then find a shallow area where you can fiddle around with your lights all day long. Using a reference image and experimenting in the actual subject.
Controlling the ambient light in a scene can really showcase the capability of snoots. By increasing the shutter speed, or F-stop, the main subject will be well exposed by the spotlight from the snoot while the rest of the scene will remain intentionally dark. Alternatively, by using two strobes – one snooted and one not – you can gently illuminate the general foreground to add color, but still have the main subject pop out of the scene.
♦ Macro/Super Macro
Since the camera’s field of view in macro photography is small, you’ll need a correspondingly small beam of light to selectively illuminate a portion of it. This requires the use of a snoot that is farther away from the source and has a much smaller aperture.
As with wide-angle snoots, it’s very important to have the ability to vary the beam’s angle to maintain creative freedom, so keep this in mind if you’re trying to design your own.
Aiming snoots for macro imaging is far more difficult, frustrating, and time-consuming than snooting wide-angle images. This is especially true for super-macro photography, where many of the subjects are often no larger than a grain of rice.
When using a snoot to shoot a macro scene with a broad, directional lighting effect, you can follow the same aiming procedure as explained for wide-angle snooting. However, if you want to effectively and accurately create macro/super macro images with a spotlight effect, you’ll have to follow a very different, and somewhat tedious, route.
Trying to hit a two-centimeter subject with a one-centimeter (1/2 inch) beam of light is no easy feat. While it is possible to aim a miniscule beam with the strobe still attached to the housing, it is far easier to detach the strobe from the camera system altogether. Being able to move the camera without disrupting the strobe configuration makes a world of difference.
Macro snooting can be made even easier if you connect your strobe to a remote trigger, instead of hard-wiring it to the camera with a sync cord. This gives you total freedom, because there are literally no strings (or cords) attached. You can even take it one step further and mount this remote strobe on a small tripod fitted with a ball-head, allowing you to position the strobe in just about any orientation. This will ensure that if you do manage to get your snooted strobe perfectly placed, it will remain there while you compose your image.
Of course, this means you will need to choose subjects that are very slow-moving or, better yet, that don’t move at all: scorpionfish, frogfish, stargazers, and coral polyps all make for perfect snooting.
The increasing accessibility of underwater photography is constantly driving photographers to be more creative. Without bringing new tools or techniques to the table, the art of underwater photography is in danger of becoming stagnant. This is precisely why tools like the snoot are essential – to advance this discipline. Whether they’re used for creating black backgrounds, spotlighting, or hard-edged directional lighting, there’s no doubt that snoots are very capable tools for creatively lighting underwater subjects.
Taken from ScubaDiver Australasia Issue 04/2012


