How to: The Perfect Split Shot Photo
Text by Matthew Smith
Photography by Matthew Smith
For me, one of the most wondrous parts of any dive is the moment when the water engulfs my mask as my head slips below the surface. I think it’s the suspense of not knowing what lies beneath, the transitional part of moving from one element to the next that feels so magical, and the thought of what alien creatures I might encounter. That is what draws me to taking half-and-half underwater pictures. I try to convey to the viewer that majestic feeling in a picture format. Split shots are perhaps the best way I can communicate to a non-diver what it’s all about, to marry a wet and unfamiliar world with a dry and more familiar one. A well-executed over-under shot also seems to be a great crowd pleaser as it has instant “wow factor”. I’d like to share with you some of the techniques and equipment I use for this type of photography and answer some commonly asked questions regarding equipment, focusing techniques, lighting, what time of day to shoot, and how to stop water beading.
EQUIPMENT
When shooting an over-under scene, you are usually creating a half-landscape, half-seascape scene, so common sense would suggest using a wide-angle rectilinear or fisheye lens to capture the entire vista. I generally use my 14-24mm f/2.8 or 14-30mm f/4 rectilinear lenses for big animals or humans, where I want to control distortion and create a natural perspective. I use the fisheye lens for reef scenes where the heavy distortion will go unnoticed.
You’ll need a dome port to shoot through: Your usual wide-angle dome port will suffice, something in the region of eight to nine inches is perfect. A bigger port makes the job much easier and conversely, whilst not impossible to shoot over-unders through a smaller port, it does make the job a little harder. It also creates some optical problems more on that later.
You may want to use your strobes for fill light when shooting into the sun at sunset or sunrise, or to add some colour to that reef.
If you’re shooting a scene where you can’t stand up, it’s a good idea to add a flotation device to yourself and camera. I sometimes strap a swimmer’s kick board under my water housing and use an inflated BCD as a raft to lean on. This will prevent you from sinking when you lift that heavy camera out of the water and it will help you to frame up your shot.
Note: Trying to shoot an over-under with your dive gear on your back after a dive is night on impossible!
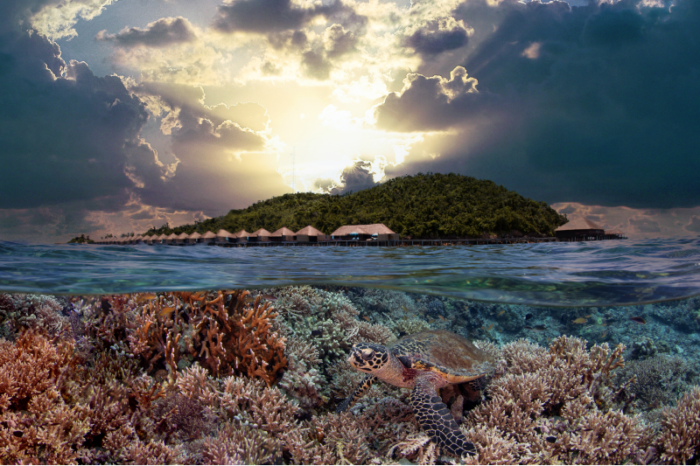
Hidden reef
WHEN
October 2018
WHERE
Arborek Island, Indonesia
HOW
Nikon D850, Aquatica housing, 14-24mm lenses, (f/22, 1/10s, ISO 400)
FOCUS
Set your camera focus points low in the viewfinder and concentrate on getting the underwater part of the scene sharp. Then, use a narrow f-stop such as f/16 or above and the let depth of field take care of the top part. It’s a great technique to use, but why?
To create a half-and-half image you are basically creating a window into another world where light and focus behave on a totally different playing field, especially when shooting through a curved optic such as a dome-shaped port. The interaction of the curved surface of the port and the refraction of the water make what is known as a “virtual image”. The virtual image appears smaller and proportionately closer to the camera underwater. If we were able to see this phenomenon at play it would look something like Fig. 1. Here we can see the camera, the virtual image below the water and the real image above the water.
As depth of field always extends much further behind our point of focus than it does in front, we are maximising our chances of getting
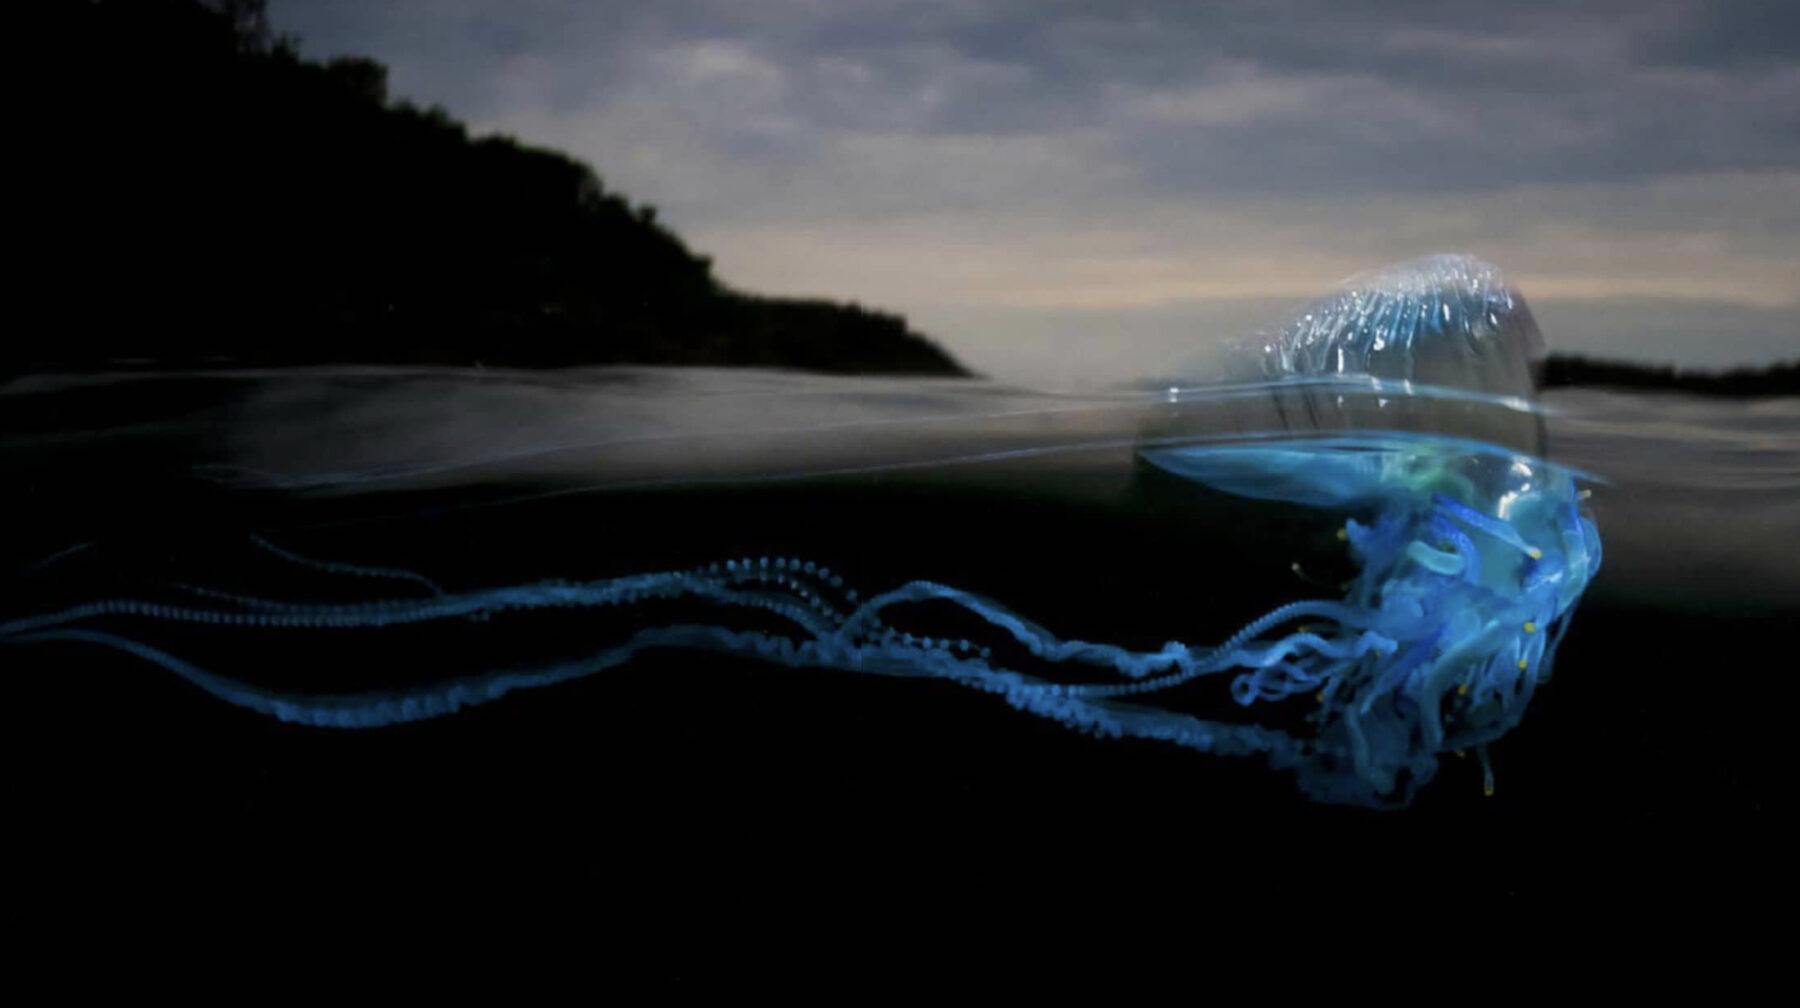
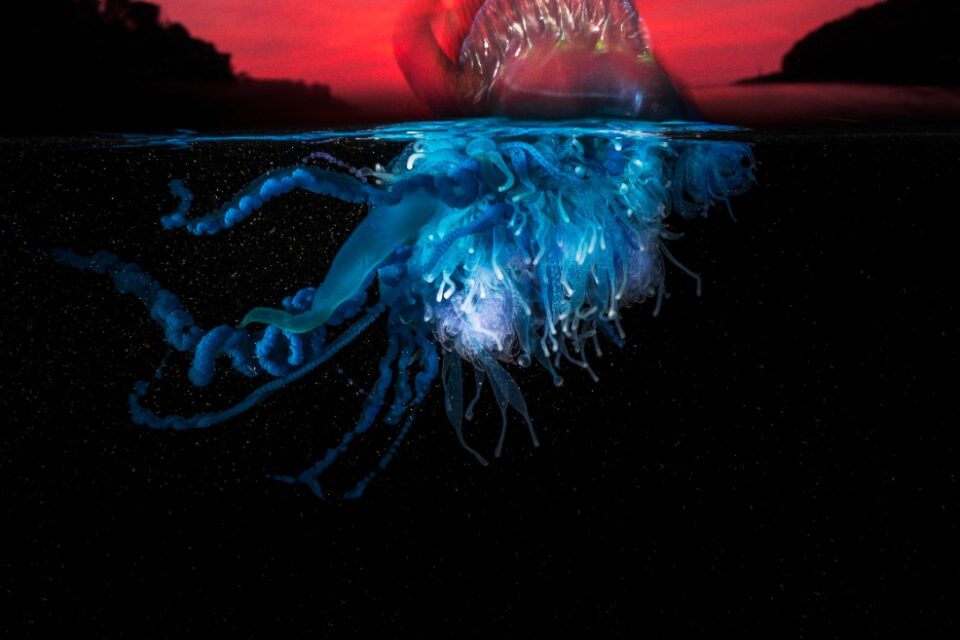
Portuguese man-of-war (Physalia physalis)
WHEN
February 2014
WHERE
Bushrangers Bay, New South Wales, Australia
HOW
Nikon D810, Aquatica housing, 8-15mm lens, (f/29, 1/250s, ISO 160)
LIGHTING
As usual lighting falls into two categories, ambient (natural) light and artificial (light strobe or continuous source). When shooting large scenes where artificial light sources will have little effect, it’s generally better to shoot at the brightest times of the day when the sun is high. However, this can cause exposure balance problems as the sky is usually several stops brighter than under the water. To overcome this issue and minimise the need for post-processing, I like to use a four-stop neutral density graduated filter. This helps me to retain sky detail and prevent it from blowing out to over-exposure. It also minimises post-processing later on.
Strobes can be used to fill in detail underwater when the sun is lower in the sky and with smaller scenes. For this technique I find it’s better to expose for the sky and then adjust strobe power to fill in the darker underwater details.
WHEN TO SHOOT
If you’re planning on shooting reef or seabed then definitely wait for low tide when there is the minimum amount of water over the coral, ideally half a meter or less. The first thing I do once I’ve found a location is to check the local tide charts and see which day is best for lowest tide at the time of day I want to shoot. If you’re shooting animals in the open ocean, tide is obviously irrelevant and the best time of day depends on if the subject is too big for proper strobe coverage or not. Anything too big to light with a strobe may well be better shot around the middle of the day to maximise light penetration. But don’t fret if the midday sun isn’t out: The look of heavy cloud in split shots adds a dramatic effect to a picture that a clear blue sky cannot.
If your subject can be shot with your strobes, shoot at any time to get your desired atmosphere into the image.
MATTHEW SMITH (AUSTRALIA)
ADEX SPEAKER (2020, 2019, 2016, 2022- to be!)
Matthew is an underwater photography educator, tour leader, contributing photographer for Ocean Geographic magazine and a brand ambassador for Nikon Australia and Aquatica Digital housings.
To learn more about underwater photography, if you attend ADEX this September 16-18, Matthew will be attending and sharing more of his wisdom!
Plunging from a world of land and sky, filtered light beneath the surface is made placid in the depths. But what if you can see each layer, all put together?
This piece is a short extract from this issue of our No.117 Collectors’ Edition of Scuba Diver Ocean Planet from 2020. Chock-full of breathtaking images taken by Photography Gurus around the world this issue takes you through the beauty of split shots, encapsulated in this issue through renowned photographers who are excellent in their craft.
Pick up your copy here

