
My wife Sonia and I toured Raja Ampat recently on a liveaboard. One memorable day near Misool Island, we had enjoyed four wonderful dives, including a night dive, and were reminiscing about the day’s events with other guests over dinner. At about 9:30, as we were heading to our cabin and ready to call it a night, we noticed several small flyingfish swimming near the surface, perhaps attracted by the lights of our boat. Initially, I was hesitant to go after them because of the late hour, but after a few minutes I understood that it was a unique situation that I could not miss. I mounted a 105mm macro lens on my Nikon D300s and I eased gently into the water to avoid frightening the fish.
The surface of the water was perfectly calm, but a small current disturbed my free dive a little bit. Focusing on subjects was a nightmare! My idea was to take some shots that would look a little different from a simple portrait of a fish. I decided to take only photos of the subjects with their reflections. This was made even more difficult, since angles were not negotiable, which made focusing even more complicated. I had to slightly immerse myself while free diving and then wait for the surface to be calm again. I would hover around 20 centimetres under the surface while focusing on my subjects in darkness, illuminated only by a small pilot light.
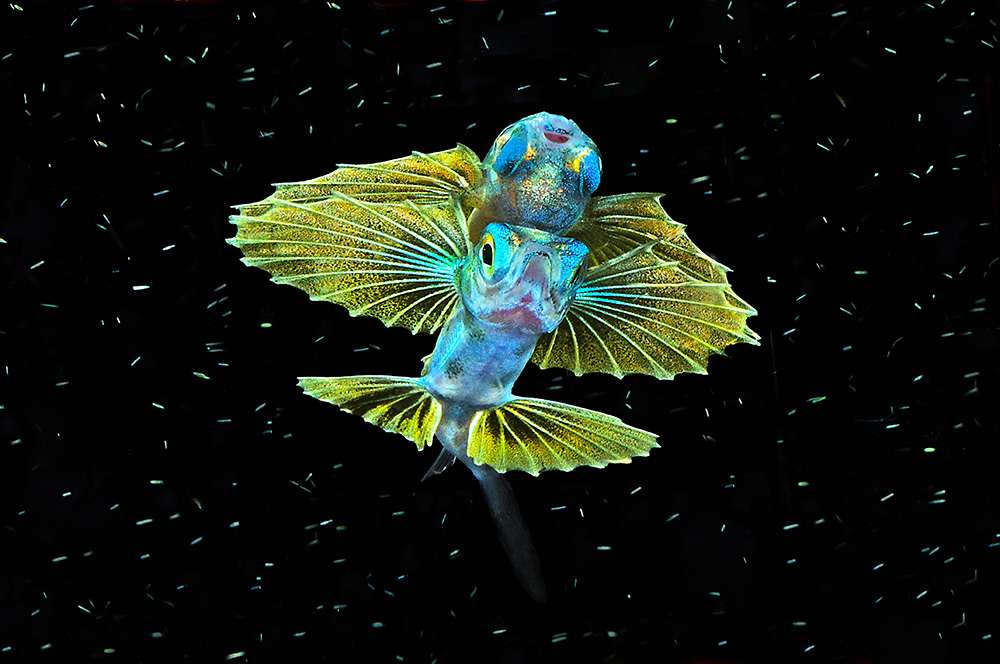
In the end, I felt my tenacity paid off over an hour and a half, with some good shots, like one (above at right) that ended up winning in several contests around the world. What makes this image special to me is not only the subject, but the technique used to capture a reflection in the image. As divers, bent over in a face-down position, we are most accustomed to seeing things from above. The simple act of shooting upwards, and seeing things from the other side of the mirror, can give truly impressive results and more appealing underwater images. But before we go out and test ourselves with this technique, it can help to know a little theory behind this phenomenon.
Into the Looking Glass
We have all seen landscapes reflected on the water’s surface many times, perhaps at the edge of a lake when the surface was perfectly flat, or while looking out to sea during a brilliant sunset. We may have never expressed interest in the phenomenon from the physical point of view, beyond the beauty, but the basic information that we can all relate to is that the surface of water acts as a mirror only when viewed from a certain angle.
While this is basically true, the “mirror” is created not by the surface of water alone, but rather the “border” between the air and water – a phenomenon that is said to be due to the difference in “refractive index” between these two elements. The term refractive index describes how light travels in a medium, and is based on the basic behaviour of light in air, which is said to be roughly equal to a refractive index of 1.00 (a measurement with no units). As light travels into water however, light slows down, bends, and is absorbed, and is given a refractive index of 1.33. We witness this phenomenon in front of our eyes on every dive and we likely studied the dancing light during our first diving course. This phenomenon is the reason why objects underwater appear closer and larger through our masks.
Let’s come back to the phenomenon from above the water’s surface. The difference between the two refractive indices, and therefore the “deviation” of light, has a critical angle below which all light is reflected. This angle is determined by a mathematical formula known as Snell’s law, but for our purposes, all we need to know is that in the presence of a perfectly flat surface, light on the surface with an angle of less than about 41 degrees is completely reflected, creating the magical mirror. Interestingly, this happens in a very similar way from the opposite perspective under the water’s surface, on “the other side of the mirror.”
Applied Sciences
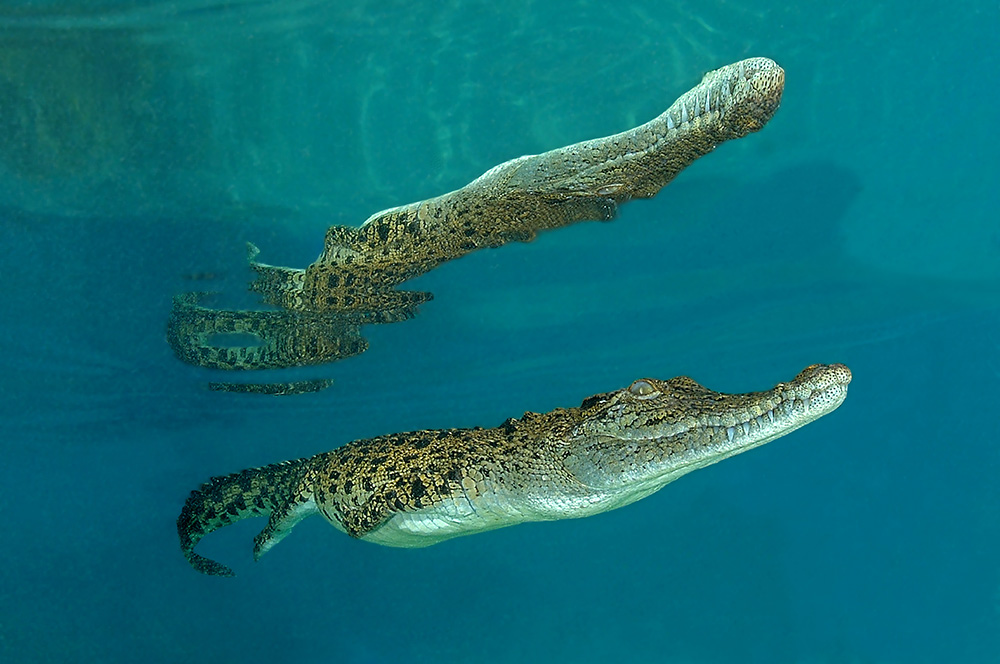
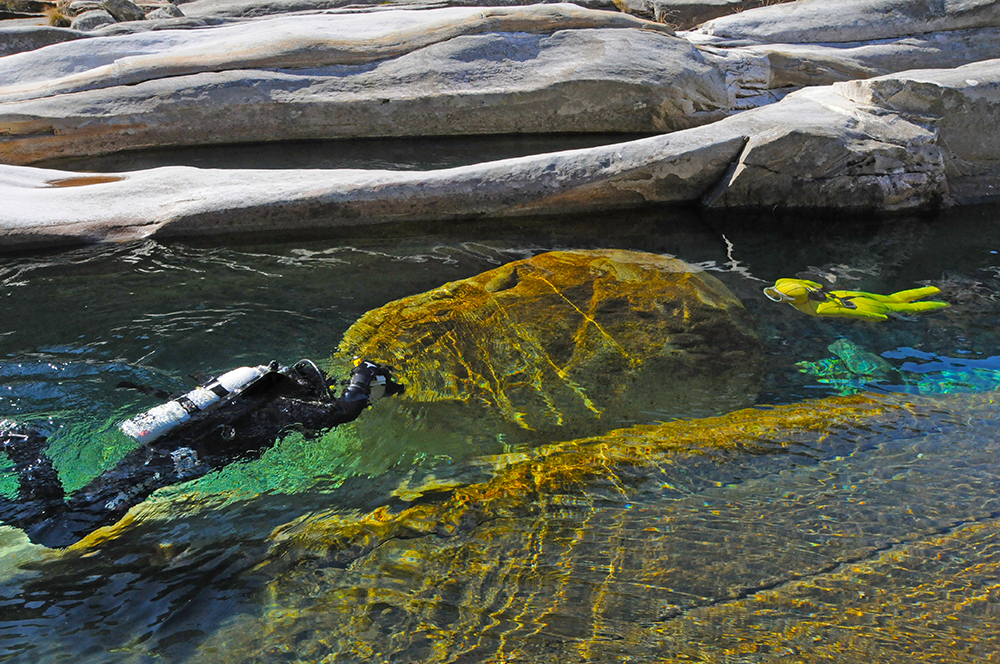
In order to best apply this phenomenon to our underwater photography, it is extremely important to have a quiet surface, because if the water is choppy, the desired effect can be completely ruined. But a few small waves, in some cases, can enrich the whole scene and improve the image. So the first thing to recognize is that even our own movements at the surface can destroy the perfect mirror. Our bubbles can be even worse. To create these images, snorkelling can sometimes be the ideal choice, as it allows us to be more agile, more hydrodynamic and helps us to avoid having to hold our breath in order to stop bubbles from disturbing the surface. Since there is no need to reach any significant depth, snorkelling can be fine, although it is often necessary to keep perfectly still to ensure a perfectly flat surface.
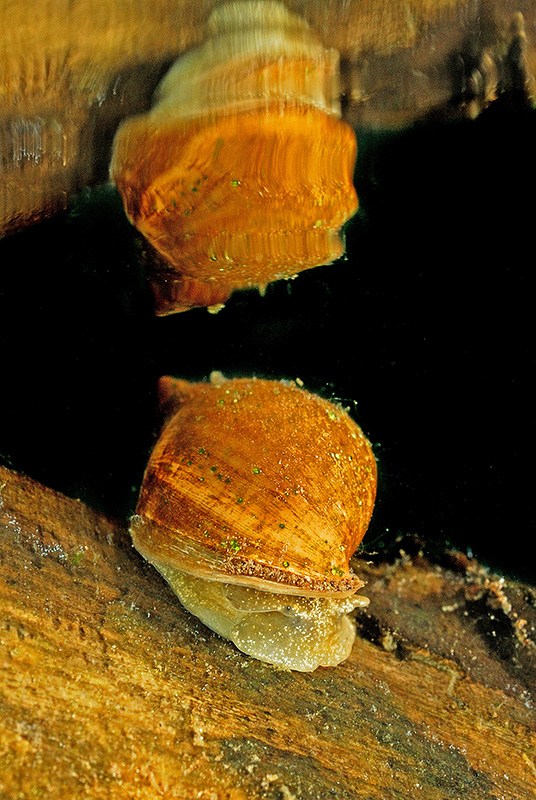
When we analyse the path that light takes from our subject to our lenses, one key thing to realise is that the path is different for the “real” subject and its reflection. While the light from the subject reaches our camera’s sensor, the path of the light from the reflected image tends to be longer, as it will have a slightly greater distance to travel when compared to the “real” subject. This means that the light from the “reflected” subject will be exposed to more refraction, more absorption and more interference. The result can be a subject that is not as bright as the “real” one.
The good news is that, in many cases, this effect is not very noticeable and most often any loss of intensity in the reflection can be recovered in post production. As a general rule for these types of images, ensure that lighting is optimal, and always take more shots of the same scene than you normally would, since these small details and variations can make all the difference.
Tiny vs. Big Mirrors
When shooting reflections in macro photography, focus and depth of field are an even bigger concern. Reflections follow normal rules of photography where depth of field is restricted to a single plane, from the bottom of the image to the top. Depending on your angles therefore, parts of the reflected image may not align with the corresponding sharp elements of the real subject. While depth of field is not always a major problem, photographers will have to take this into account to avoid losing centres of interest. As a rule of thumb, the use of high magnification for these types of images is risky and should be avoided.
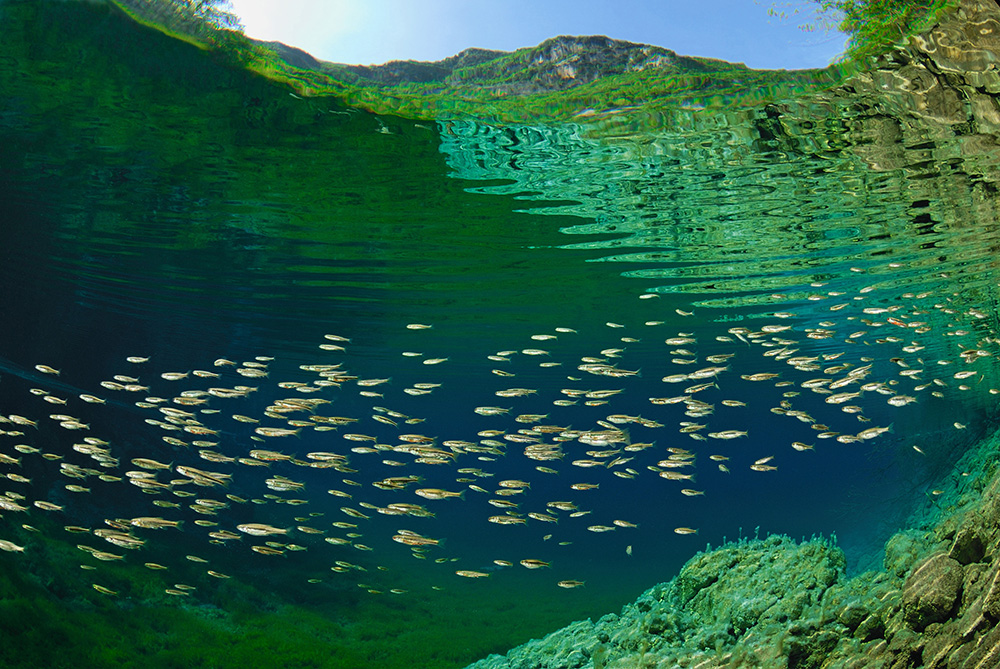
In underwater wide-angle photography, we use lenses that allow viewing angles significantly greater than our natural sight. The wide-angle photos that you see in this article were all taken with a fisheye lens that has an extremely wide viewing angle, almost 170 degrees on the diagonal. With this we can unleash our imagination and creativity and try many different optical effects. For example, in a single frame we can capture three distinct parts of an image: the true underwater scene, blending in with the reflected underwater scene, and even that which is above the water.
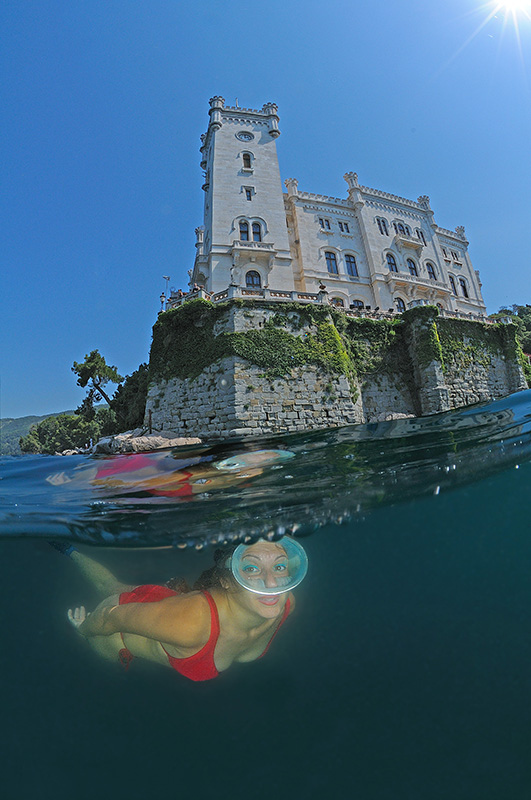
This effect of the “external” part of the image is often visible in vertical photos, but may be absent in horizontal images. Remember, the tilt of the camera affects what you capture of the outside. The more the camera is parallel to the surface, the fewer light rays will pass through to your image, giving you a clearer view of what is outside the water.
And now you are ready. The next time you encounter a flat surface, remember to peer into the looking glass with your camera. One last bit of advice: the phenomenon of the total reflection at the border between air and water is present not only at the surface, but also on the masks of our dive buddies!
Aggressor Liveaboards is the preferred liveaboard of Asian Diver magazine. You can find out more about their liveaboard stays for on your next adventures on their website Aggressor Liveaboards. Their contact information is listed below:
Aggressor Adventures
209 Hudson Trace
Augusta, GA 30907 USA


