
I’ve always been intrigued by images that are different from the norm. To me, the world looks better sliding of the planet; using colours, composition, subjects, focus and occasionally techniques to change the way we see things. Back in the day, I used to spend hours in the library reading about experimental photographic techniques.
As a photographer, I think it’s important to explore old techniques and improvise new ones. Losing control doesn’t have to be a bad thing – it can mean getting comfortable with your imagination and creativity.
I’ve always loved shooting macro. Having both Nikon 105mm and 60mm f/2.8 Micro lenses really helped me get closer to my subjects. Then it was the +4 , +10 dioptres, magnifying glasses and all that. But I was not satisfied with the images. I wanted more magnification, but I also wanted images with some character.
In the old days, people got creative with what they had. You wanted magnification? Grab your DSLR and your 50mm f/1.8 lens, and then take a reverse ring adapter and invert it. And there you have it, reverse ring macro, or RRM.
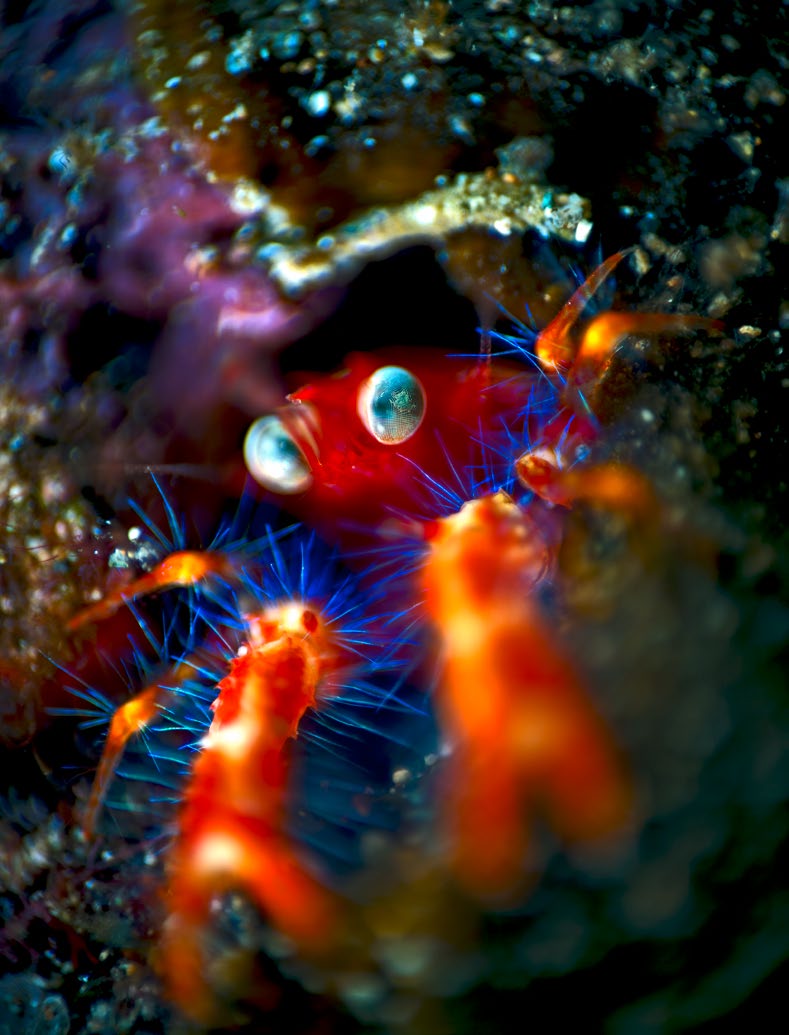
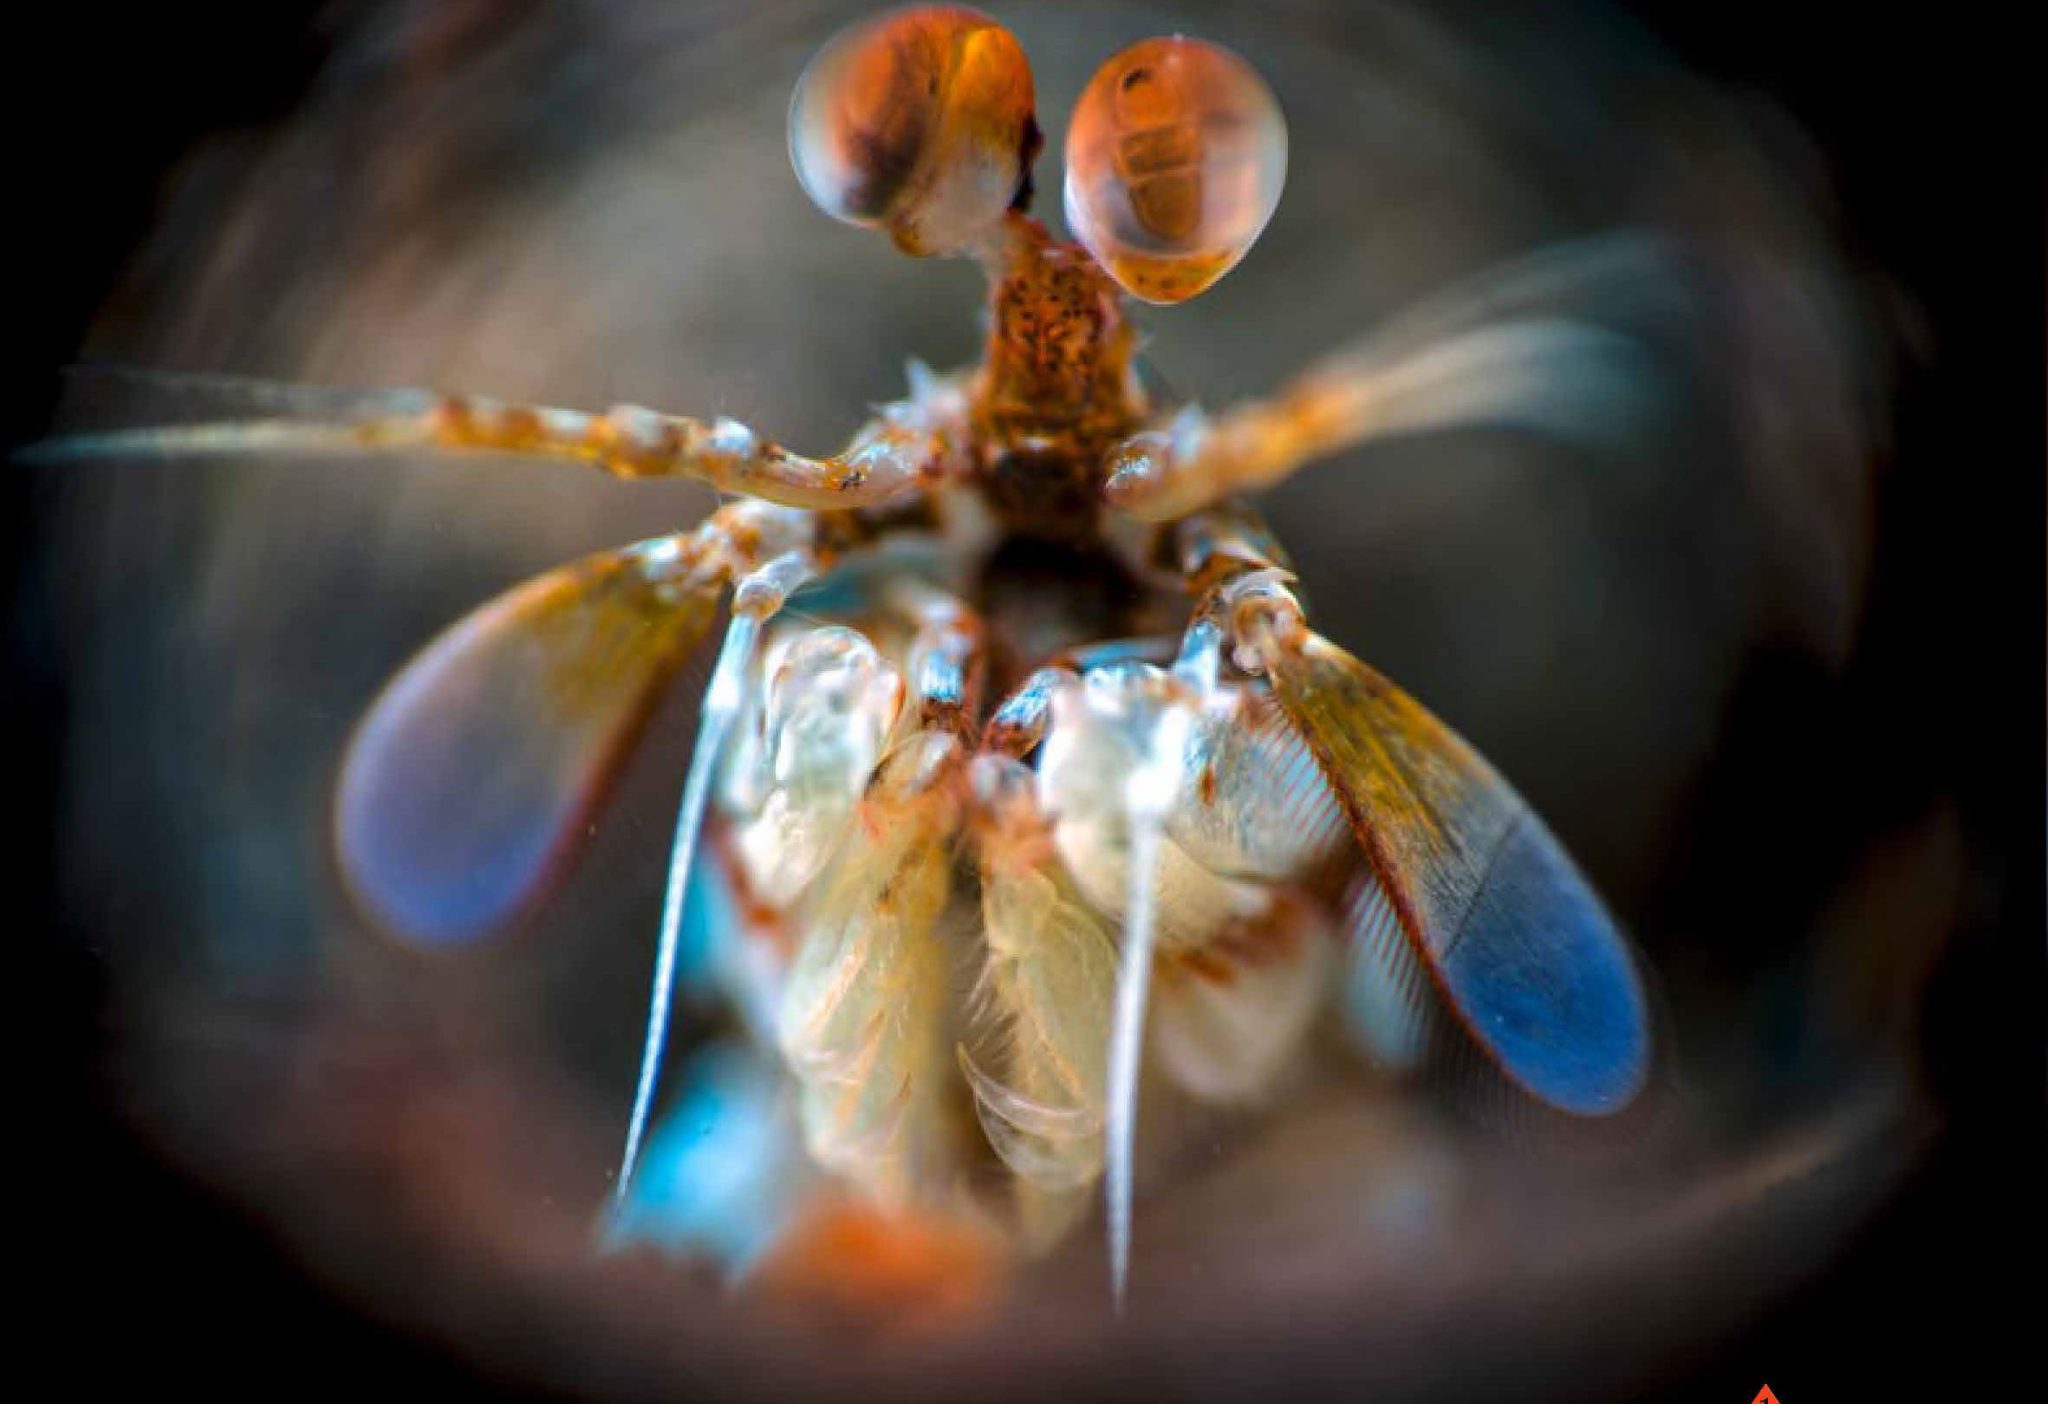
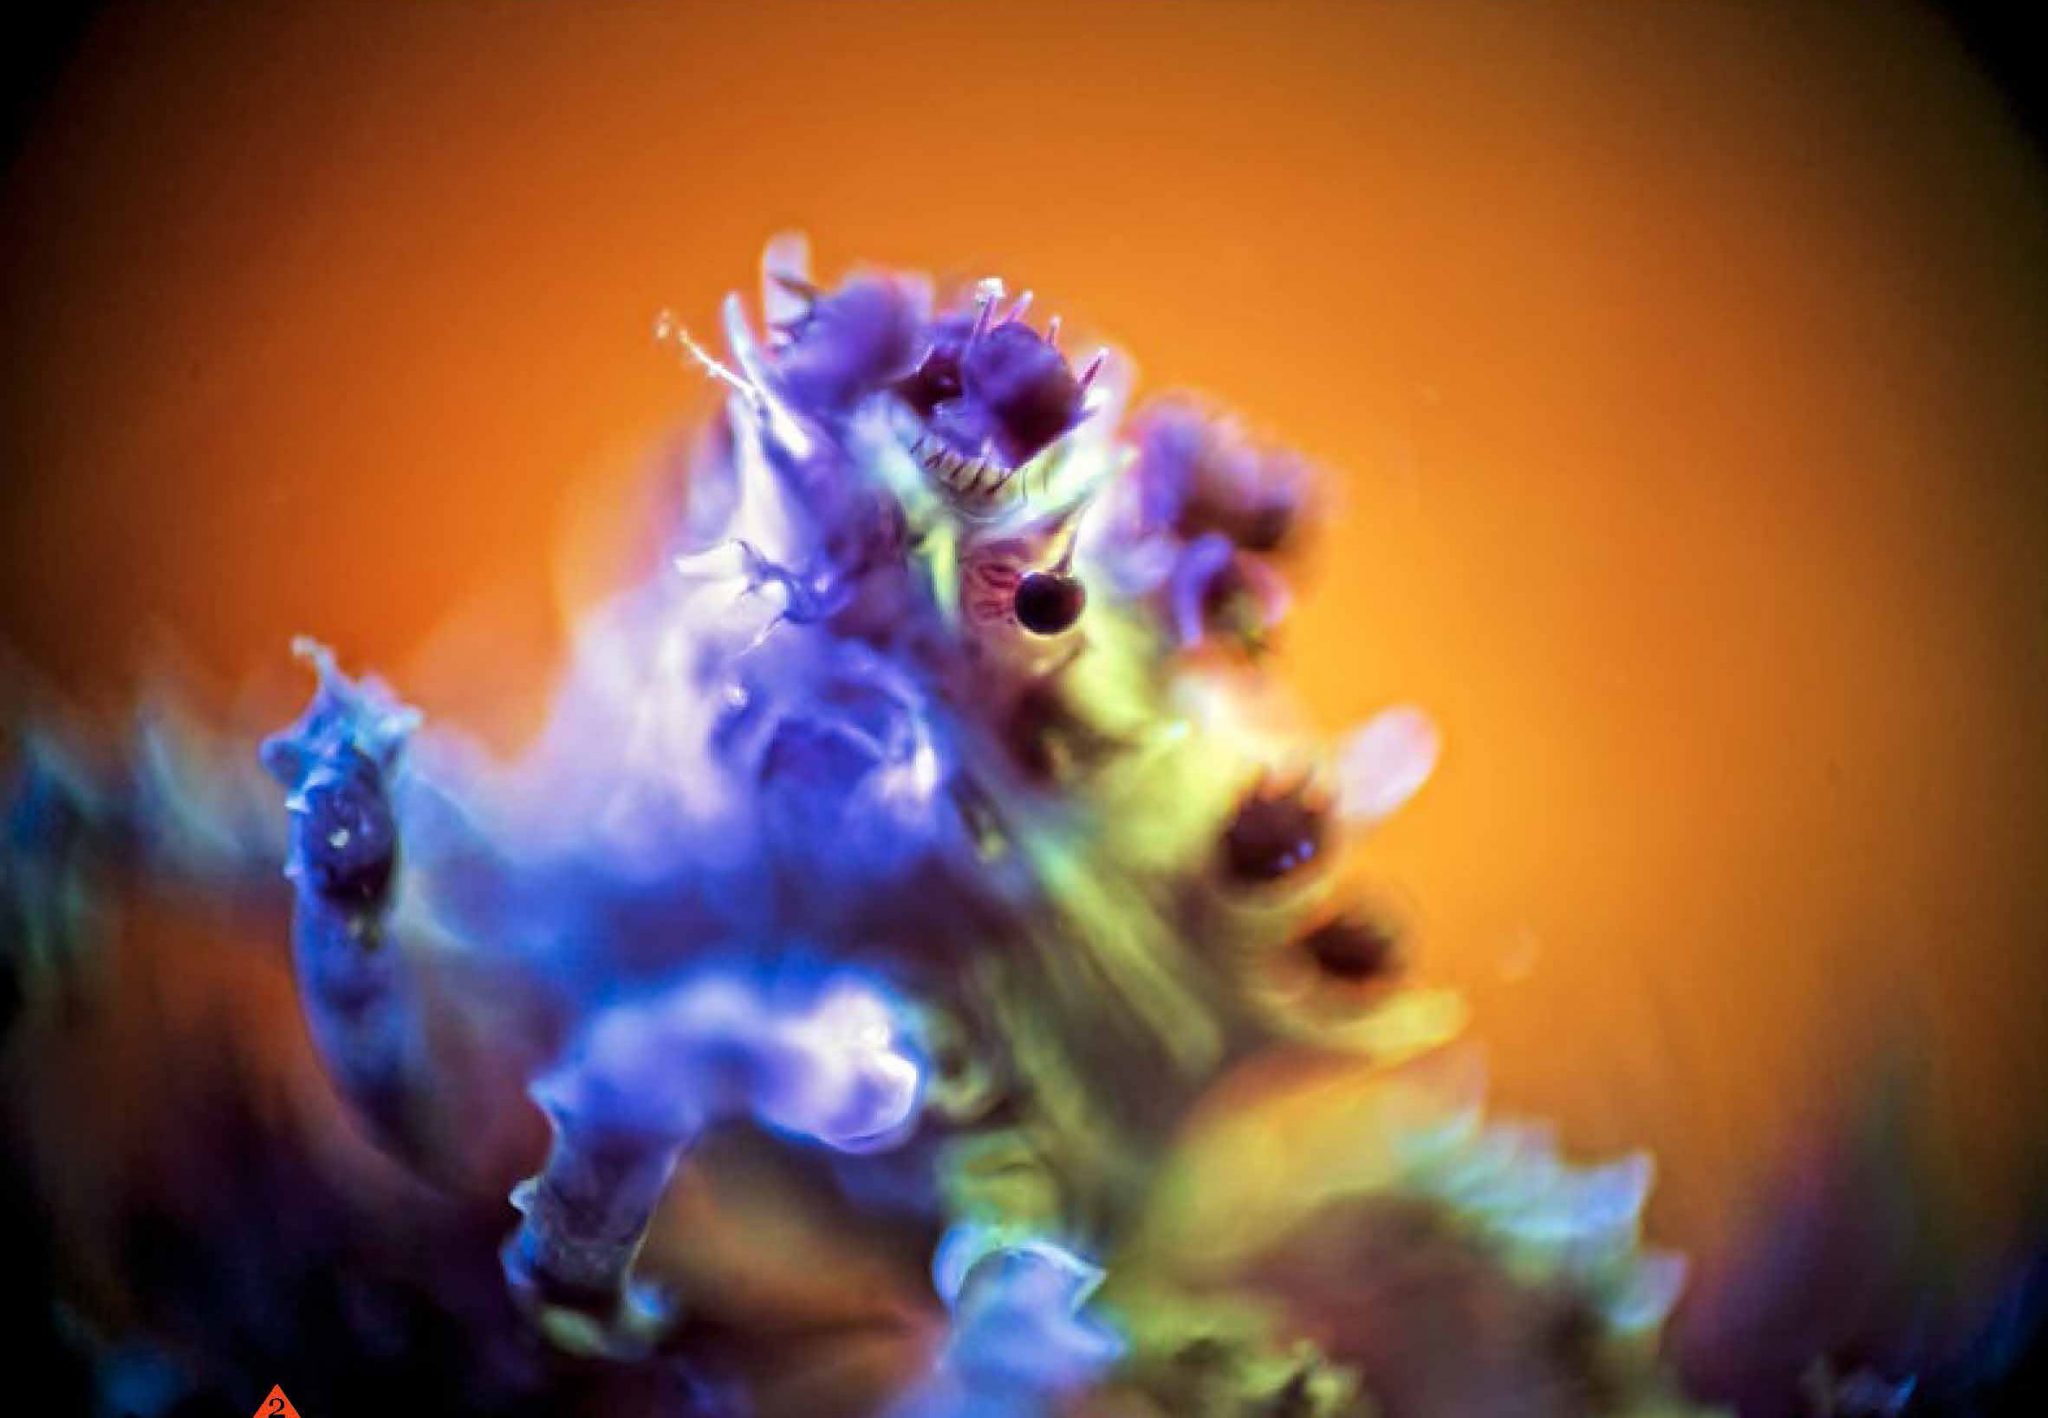
The beauty of RRM is that it allows you to get really creative. RRM allows you to get really close to your subject. However, it also means you have to work within a tight space, a narrow area, to get your images super sharp. Light is essential. You need light not only to see what’s in your viewfinder but also to get pin-sharp images. But it doesn’t stop there. There’s also the stacking of two lenses to get even more magnification and a creative bokeh background.
BOKEHLICIOUS: THERE’S SO MUCH MORE TO BLUR
Bokeh is a Japanese word that describes the precise quality or appearance of out-of-focus areas in a picture. It’s sometimes used to describe blur in general, but that’s not all there is to it. When used creatively, bokeh takes images to a totally different realm. Bokeh is influenced by bright highlights or light sources in the background, or by the shape of the diaphragm (iris) in the lens. RRM allows you to take bokeh to a whole new level.
TYPES OF RRM TECHNIQUE
Before we get all crazy, here’s some basic understanding of the technique. The idea behind the reverse technique is that you allow the reverse lens to first magnify the subject in front of it; then the lens that is mounted normally will capture the enlarged image of your subjects. Bear in mind that a reversed 50mm lens alone has a magnification of +20 dioptres. The longer the focal length, the more magnification you’ll get.
There are essentially two types of RRM:
1. Single lens reverse, usually a 50mm f/1.4
2. The combo lens setup, combining a zoom and a 50mm f/1.4
Equipment for RRM:
1. DSLR
2. Zoom lens
3. 50mm f/1.4
4. A second zoom lens
(If you’re planning to have a combo setup)
5. Macro coupling ring
6. Reverse ring
The basics:
- A reverse 50mm f/1.4 lens has got a magnification of at least +20 dioptres.
- When using a double lens setup, experiment with focal lengths to achieve your preferred final image or magnification.
- Light your subject appropriately, either with a strobe or torch.
- The shorter the focal length of the reversed lens, the greater the magnification, and the shorter the working distance.
- The longer the focal length lens, the more magnification you’
The results may vary and it all depends on the type of lenses you use. This opens up a whole new way of understanding your image capture and the character of the shot. While the process itself is relatively straightforward, it also involves a lot of trial and error.
CONTROL AND LOSING IT
Now that you have your equipment, you need to understand your camera’s controls: shutter speed, aperture and ISO. Every control plays its part in getting your desired effect.
The hardest part of this technique is the limited working distance between subject and camera: around 2.5 to 4 centimetres, or closer.
UNDERSTANDING YOUR APERTURE
Most underwater macro photographers typically use f/22 and f/16. These are good starting points and allow more of the subject to be in focus. However, sometimes going in the opposite direction gets you the best bokeh shots – it’s entirely a matter of personal preference.
FOCUS ON RRM
The Auto Focus is useless here: It’s best that you teach yourself to adapt to manual. The trick is to move back and forth in relation to your subject. Minor movements are best. Practise on land and later in the pool to familiarise yourself with the setup. Your depth of field is going to be very limited – “paper thin”. Stepping down your f-stop helps, as does avoiding all sudden movements. Of course, when you’re in the water, there are other elements to consider like current and other divers finning into your path. Discipline and good buoyancy control is the key. Practise makes perfect.
Read the rest of this article in Issue 5/2014, AA No.79 of Scuba Diver magazine by subscribing here or check out all of our publications here.


