
Introduced back in 2010, Adobe Photoshop’s Content Aware Fill promised some revolutionary functionality: repair or replace a large area of a photo with content that could or should have been there but wasn’t. Sounds far-fetched? Well, it actually works! Sometimes, anyway.
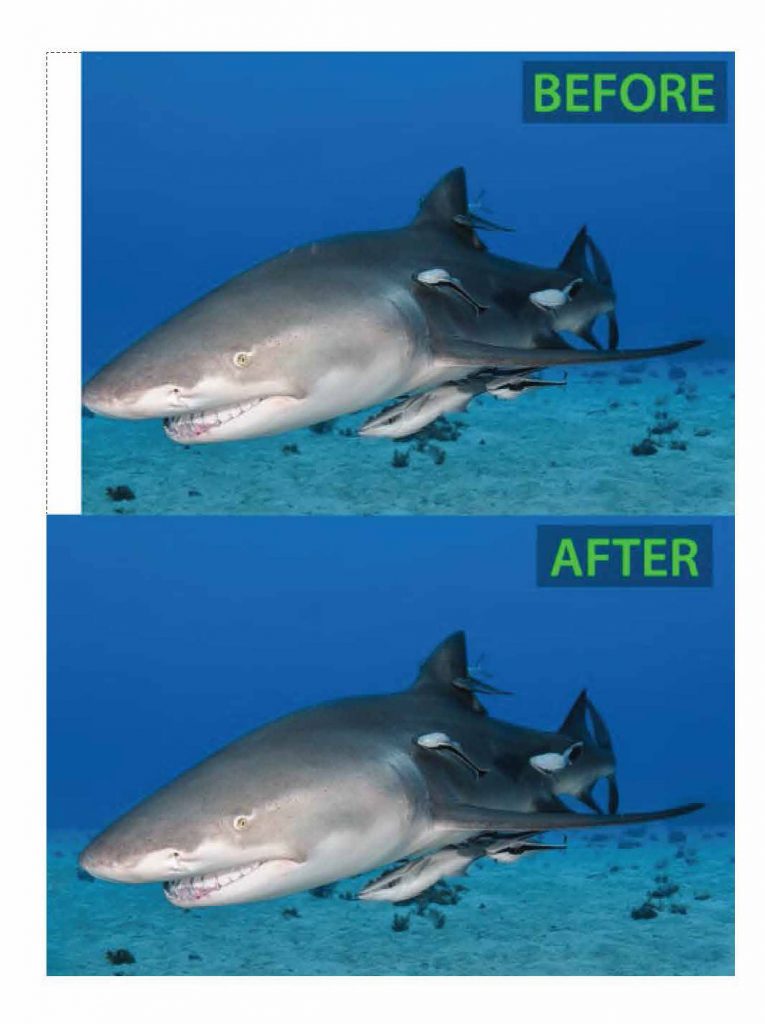
Let’s look at an example where it typically works brilliantly: a shot of an animal subject on a clean background, but one that is a little cramped – in fact, some of the subject got cut off by the edge of the frame.
 Before starting this technique, finish as much of your usual editing workflow as possible.
1. Open your image in Photoshop and grab the Crop Tool. The Crop Tool doesn’t only let you clip off part of the picture; it also lets you add area to the canvas.
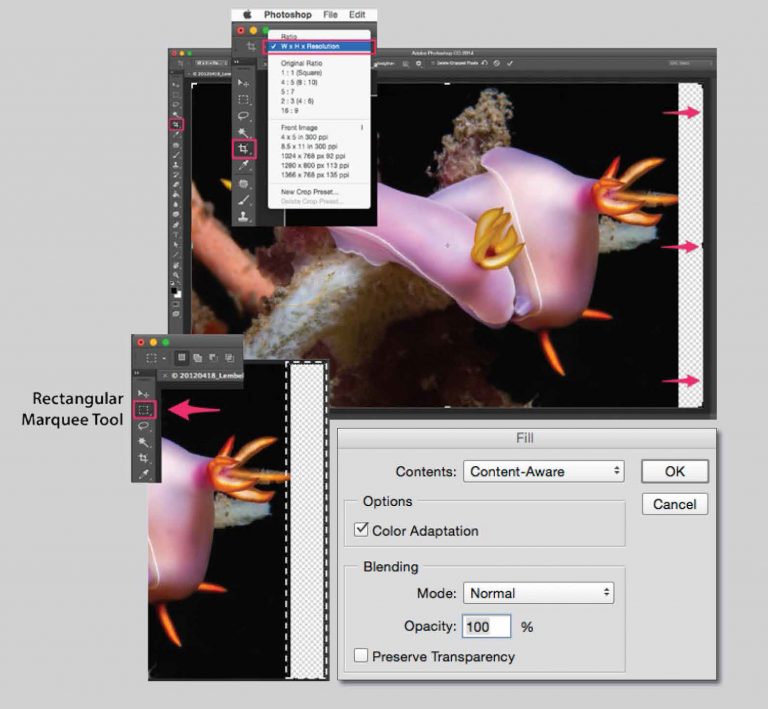
2. Choose W × H × Resolution from the Tool Options bar dropdown menu to unlock the aspect ratio. Grab the middle crop handle on the edge you want to extend and pull the side of the crop rectangle away from the image to tack on some additional space.
3. Hit Return, Enter, or the Done button to set the crop.
4. Choose the Rectangular Marquee Tool (keyboard shortcut M) to create a selection that includes not just the newly added canvas area, but also a narrow strip of pixels from the original image. This gives Photoshop some image information to work with.
5. Go to Edit > Fill and choose Content Aware from the drop down menu in the dialog box. If you see a colour adaptation checkbox, make sure it’s ticked on. Hit OK.
Now comes the fun part. Photoshop analyses the pixels in your image and tries to guess what you want to fill the selected area with.
For the rest of this article (Scuba Diver Issue 4/2015 OP No.4) and other stories, check out our past issues here or download digital copy here.


